Microsoft Forms is very popular because it is a very easy way to create web forms quickly. You can create surveys, quizzes and simple forms, and easily see results as they come in. This quick tutorial shows how you can use Microsoft Forms, convert a from into a group form, how to access the result file and how to add additional tasks with Microsoft Flow or Azure Logic Apps. So, here we go.
Who can work with Microsoft Forms?
At the beginning, I would like to inform about licensing: Users who want to create a Microsoft Form need to have one of the following licenses:
- Office 365 Education licenses: Office 365 Education, Office 365 A1 Plus, Office 365 A5, Office 365 Education E3 prior to its retirement
- Office 365 Commercial licenses: Office 365 Business Essentials, Office 365 Business Premium, Office 365 Business, Office 365 ProPlus, Office 365 Enterprise E1, E3, and E5 plans, Office 365 Enterprise E4 customers who purchased E4 before its retirement
- U.S. Government Community Cloud: Office 365 GCC and GCC-High G1, G3, and G5
- Microsoft personal account: Hotmail or Microsoft Account (MSA, formerly known as Live-ID)
See more at Frequently asked questions about Microsoft Form. Users who respond to a form don´t need to have any Microsoft license or Microsoft Account (dependent on the form settings, when set to anonymous or known-users). Just to mention, Microsoft Forms is GDPR compliant.
Start with a new form
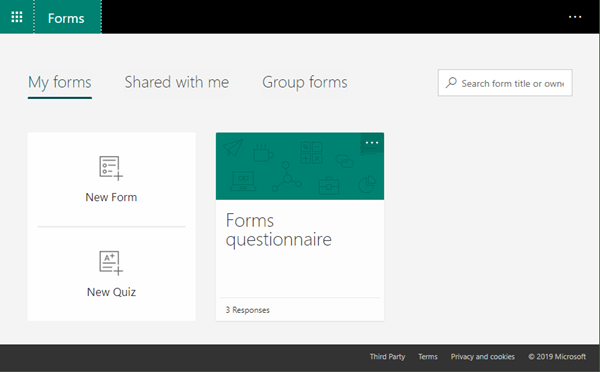
In your web browser, go to forms.office.com, sign-in with your Office 365 account and you are ready to go…
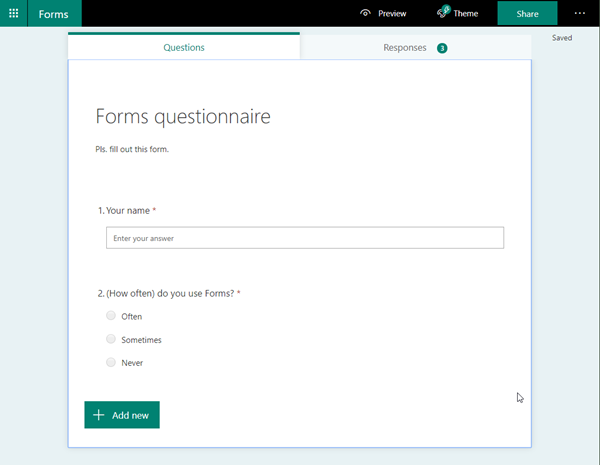
Add your title and questions in the web editor. A new form is created in a few minutes. "Preview" helps to see and to test the form.
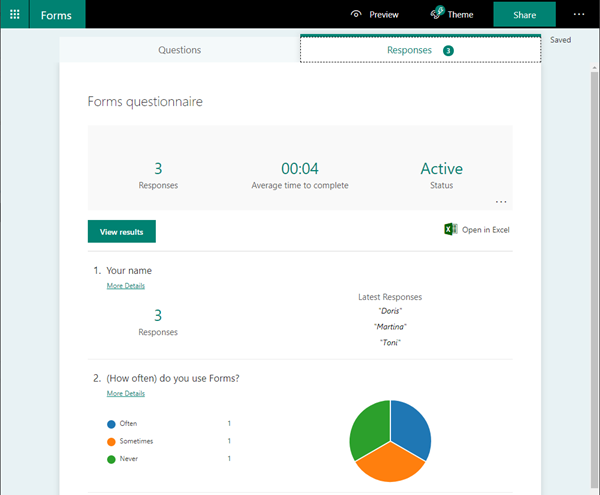
The results are automatically stored in an Excel file and can be viewed in the browser as well. Here are already 3 answers existing and graphically displayed as a quick overview.
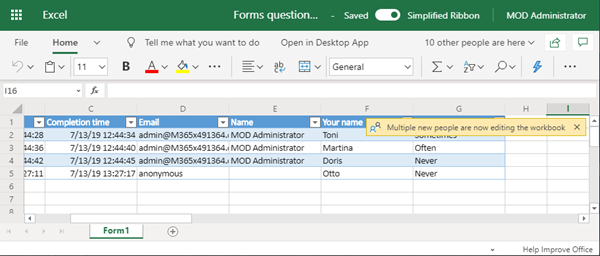
"Open in Excel" generates an Excel file that is downloaded showing all responses, one line per submission.
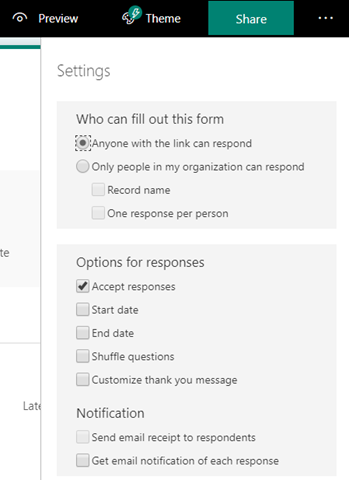
Settings: Anonymous or known users
In the "…" Settings menu, you can define if this form can be used by anyone who receives the Share-link, or by authenticated users in your Office 365 tenant only. The default is set to "Only people in my organization can respond", so, remember to change it if necessary.
Sharing the form
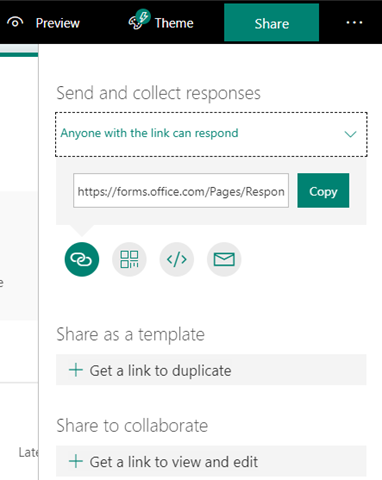
…is as simple as designing: Click on "Share" and copy the generated link (or mail it directly or use the embed form code, etc.). The Share-link looks like this: https://forms.office.com/Pages/ResponsePage.aspx?id=<form-id>
Hint: This form ID can be used in Microsoft Forms actions if the form does not show up, see below.
Move a form to a group to give access to other editors
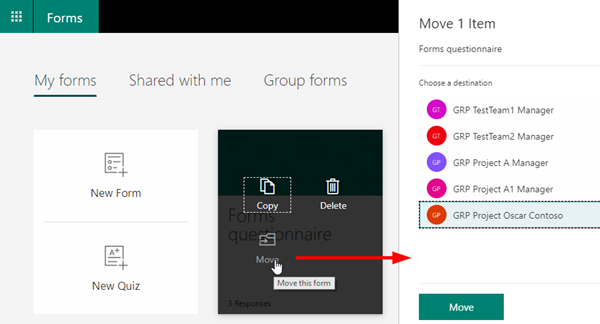
To allow other users to work on your form, move it to an Office 365 group as shown here. Click on the "…" settings icon and move it to a group.
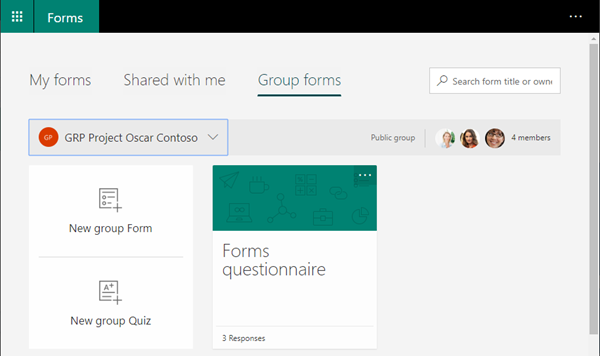
The form disappears from "My forms" and shows up in the "Group forms" in the selected Office 365 group.
The benefit now is that not only the creator of the form can modify it, but also all team members of the Office 365 group. In our sample now 4 users can adapt that form as we see in the following screenshot.
So far, so good.
Access the Excel result directly in the group files!
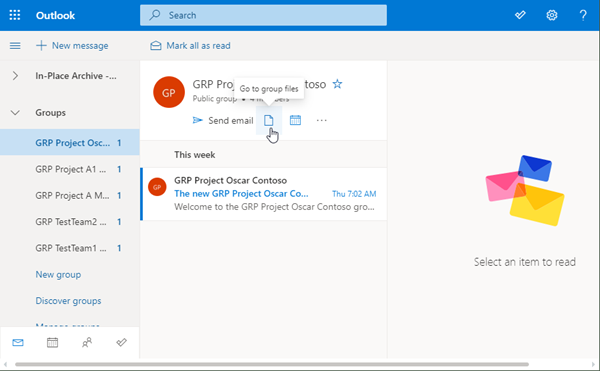
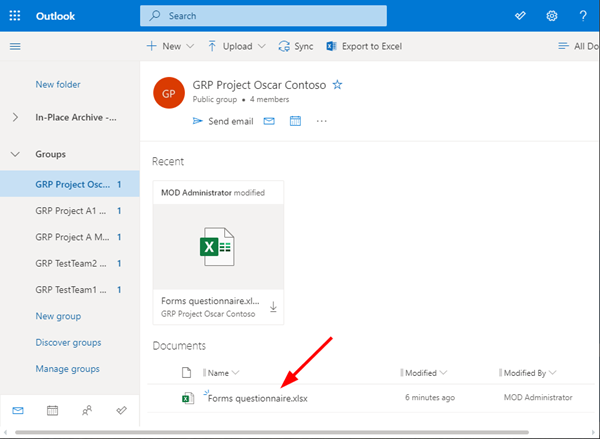
Now comes a mostly unknown feature: When a form is stored in an Office 365 group, the result file is moved to the files of that group! So, the Excel file can be directly accessed in the group files. Here, we see the group in Outlook for the Web and open the files of that group that are existing in SharePoint Online.
We now see the existing Excel file being moved to the group files. It can now be used directly from here.
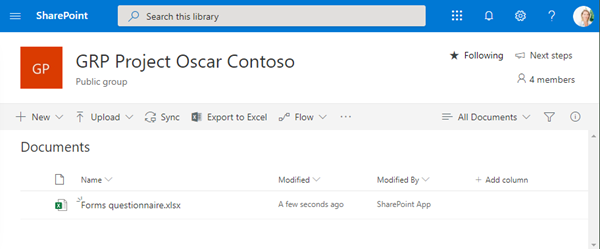
Of course, you can also access the result file directly in the SharePoint Online site of the group:
https://<your-tenant>.sharepoint.com/sites/<Group-Name>/Shared%20Documents/Forms/AllItems.aspx
All group members can now work with the result directly.
I think that's a big advantage when working with Microsoft Forms to be able to access the result file directly.
Add Flow or Azure Logic Apps for additional tasks
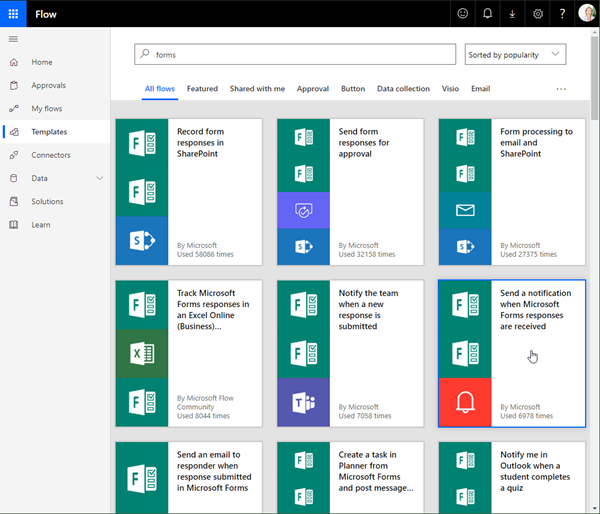
Just to mention: Often it´s also helpful to use Microsoft Flow or Azure Logic Apps for actions that shall happen when a form is submitted. At Flow, there exist a bunch of ready-to-use templates to work with data that is submitted from a form as we see here.
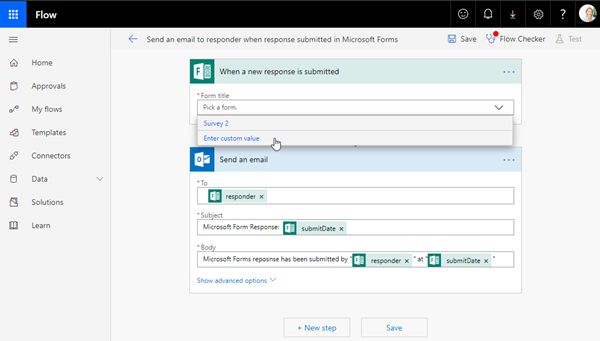
For example, select the "Send an email to responder when response submitted in Microsoft Forms" template. Authenticate if necessary and continue. Flow generates the necessary steps out of the template.
Here, you need to select the desired form. Currently, group forms do NOT show up in that list. Our "Forms questionnaire" existing in our group is missing…
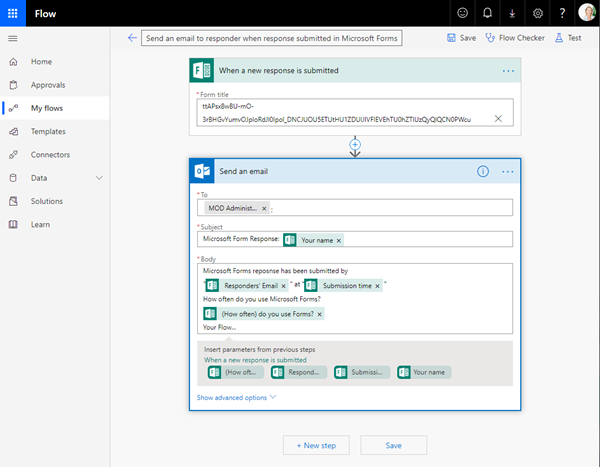
To workaround that, get the group form ID by opening the form from forms.office.com (or from the Share-link as mentioned above). Then copy the URL part starting from the FormID=… to the end.
In my sample, the form ID is ttAPsx8wBU…
Now use that form ID in the Flow by selecting "Enter custom value" and then paste the form ID… and customize the email and actions as required.
Save the flow and try it out by submitting another response…
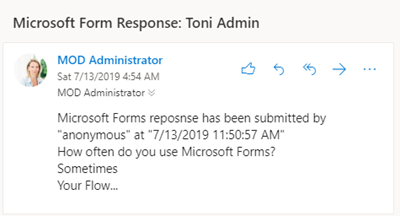
In this sample, the Administrator got an email.
So, we can do various actions in the Flow additionally if required.
Summary
Microsoft Forms are a quick way to create simple web forms for surveys, quizzes and forms. While it is easy and quick to develop forms, you can not upload files and prefill forms. Currently, for such features you have to dodge on PowerApps. Anyway, Forms provide a great tool for simple scenarios, also combined with Flow. I hope this short article helps to create useful and quick forms for various requests.
Categories: Microsoft, Office365, Microsoft365, Office, English, Cloud, Business Intelligence, Flow, Logic apps
Source: https://blog.atwork.at/post/Working-with-Microsoft-Group-Forms-and-Flow
