PowerApps are very powerful and simple to use.Through the integration in SharePoint Online lists, we now can create our custom forms within a SharePoint site and add additional features as calculations, modifications and even visualizations. See here, how to integrate a map for showing a location instantly directly in SharePoint without any coding!
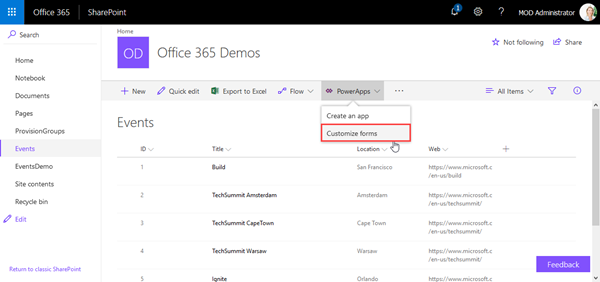
In this sample, I created a custom list and added a column Location as a single text field. In the PowerApps menu, we see the (new) Customize forms option. As the name says, this allows to modify the display and edit form of that particular list with the PowerApps Online Studio.
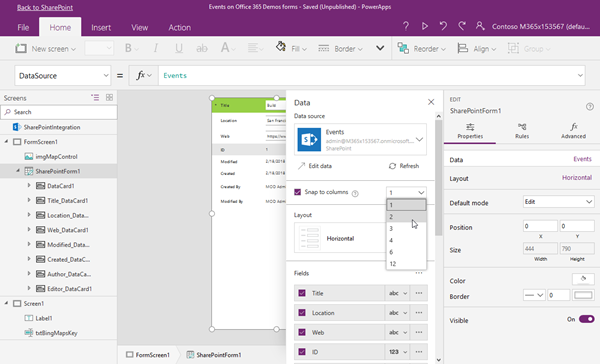
The screen with the SharePointForm can now be modified. So, we can change the design easily in the editor, as shown here.
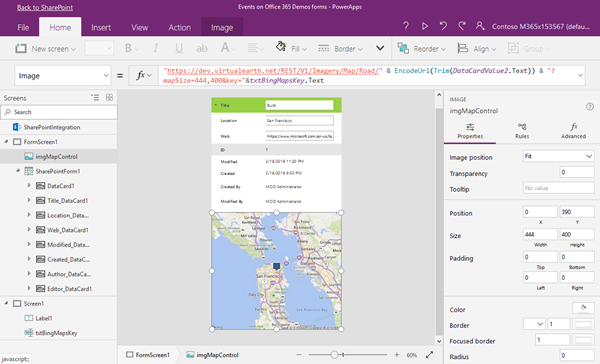
I thought, it would be a good idea, to add a map to visualize the Location. Kindly, Pratap Ladhani, Principal Program Manager at Microsoft, wrote a great blog post how to accomplish that in the PowerApps Blog at Displaying a Map using an Image Control in PowerApps and Bing Maps or Google Maps API. So, it’s easy to follow the steps. The important part is to generate a key for Bing Maps. Once you have that key, you can add an image control and set the Image property to this path:
"https://dev.virtualearth.net/REST/V1/Imagery/Map/Road/" & EncodeUrl(Trim(DataCardValue2.Text)) &
 "?mapSize=444,400&key="&txtBingMapsKey.Text
Yo just need to adapt your SharePoint field and where the key Bing Maps is stored. I followed the advice to put that in another screen, but you can hardcode it directly into the formula as well. The following screen shot shows the result in the PowerApps SharePoint form.
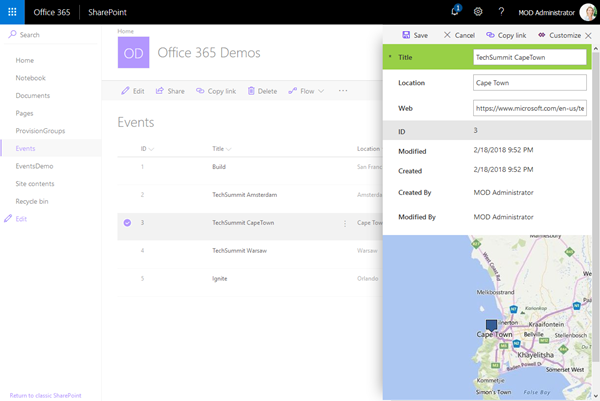
Once the form is done, click the Back to SharePoint link, save and publish the changes. The custom form is registered in the SharePoint list properties. As result, this form will be used from now on, when a user clicks Open or Edit in that list. The PowerApps form works with the designed behavior. Once, the Location field is modified, the Image with the Bing Maps endpoint shows the location as in this screenshot.
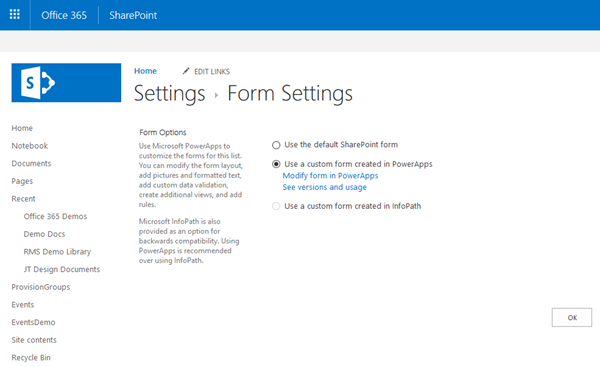
As Administrator, you can customize the existing PowerApp form anytime. To change the behavior, go to the list settings. Here you have full control to switch between the options SharePoint offers for displaying and editing that list: Default SharePoint form, a custom form created in PowerApps (with versioning) and the (old) InfoPath form.
That’s really cool, or? Custom functionality without coding (and finally, forget InfoPath ![]() ).
).
So, SharePoint and PowerApps work together very well. The SharePoint and the PowerApps team did a great job. Benefit from the new features in your SharePoint Online environment!
Categories: Cloud, Developer, English, Microsoft, Office, Office365, PowerApps, SharePoint, App, Mobile
Source: https://blog.atwork.at/post/Tips-for-PowerApps-SharePoint-Customize-forms-and-Bing-Maps
