SharePoint (or Microsoft) lists provide a good storage for not too extensive structured data. Sometimes administrators want to restrict access to certain items or lines. This approach shows how you, as an administrator, can do this without using item permissions, but with simpler and easier-to-manage views and permissions.
The goal
Administrators often want users to see only certain records or only their own records from a larger list. Technically, it is possible to set permissions for specific users per item (see below). On the other hand, setting item permissions is not a good solution in every use case. If a SharePoint list is filled by a given user or by a task, and specific people shall see only their data in a list, depending on their department, or similar organizational information, setting item permissions can be elaborate in terms of effort.
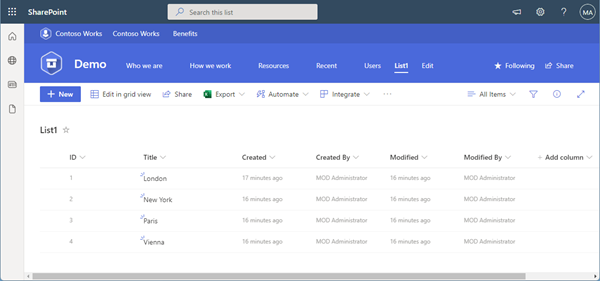
Let´s develop a sample. List1 contains four rows with city names. As we see, all items have been created by an admin.
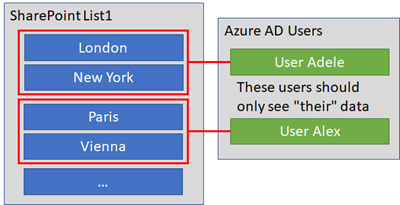
The goal here is to restrict access in the list to the first two items, London and New York, only to user Adele and the last two items Paris and Vienna to user Alex, as shown here.
Other users should not see these items. As mentioned above, this list is maintained by other users, or by a scheduled task (e.g. by a flow or an Azure Logic App, or some other automatic mechanism).
Out-of the box permissions
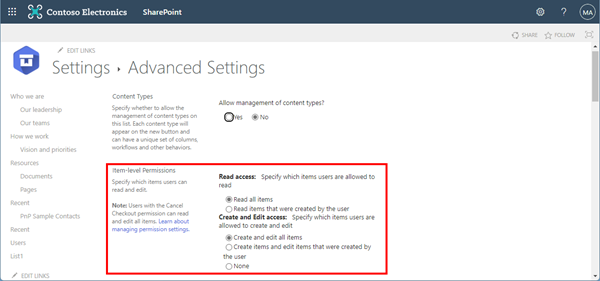
In SharePoint, there exist default permission levels that enable users to perform a collection of related tasks. If you want users to see and edit only their own items in a list, but users in an "Owners" group can see and edit everything, you can set the permissions in the List / Advanced Settings as here:
Here we go a different way and will use List views and permissions instead to be more flexible with the list results.
Lists links and limits
You can find more information about working with SharePoint, aka Microsoft lists here: Customize permissions for a SharePoint list or library. Although lists can store up to 30 million items, SharePoint Online has a list view threshold of 5,000 items per view. Also, see more about working with large lists at "The number of items in this list exceeds the list view threshold" when you view lists in Office 365 and Manage large lists and libraries.
Step 1 - Preparing the list with the record owner
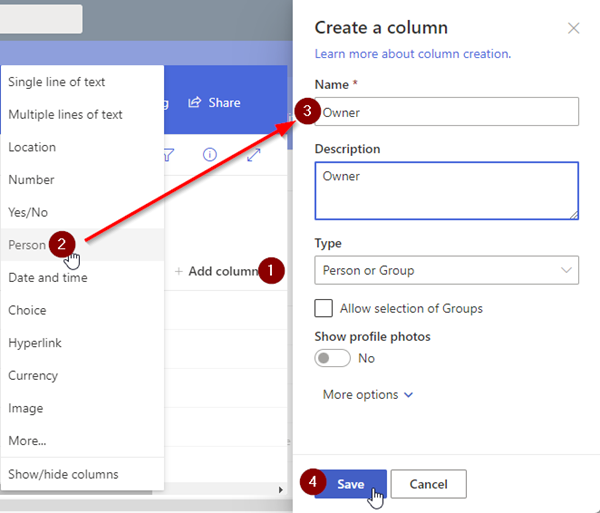
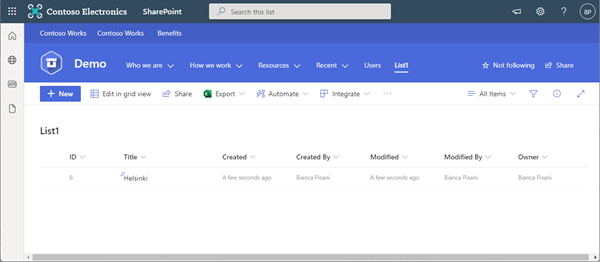
Back to our scenario. In SharePoint, we can filter a view for the current user. To make this work, we need the user added to the list, specifically, for each element. So, the first task is to add a new column Owner of type Person to the list, as here:
Note: It does not work to add a new column with type "Single line of text", it must be a "Person" column.
Now we can add the "Owner" (the person who shall be able to see this item) to each existing item, as as defined above: Adele for the first two lines, Alex for the last two lines.
When done, we click "Exit grid view". We now have the owners set.
Step 2 - Modify the view
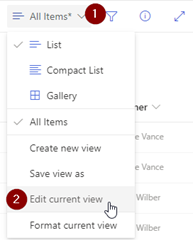
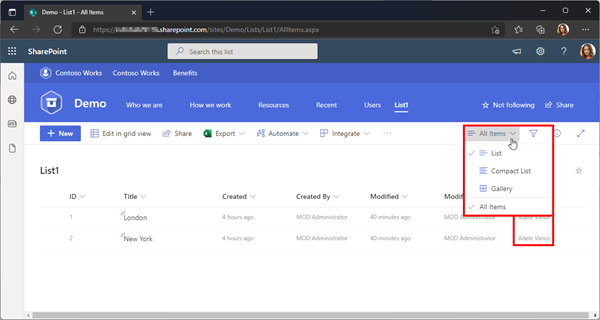
Now, let´s edit the All items view (which is a public view and by default existing for all users). Click on All items and "Edit current view". Of course, you could also create a new public view, but don´t forget to modify this view as well to show no records then.
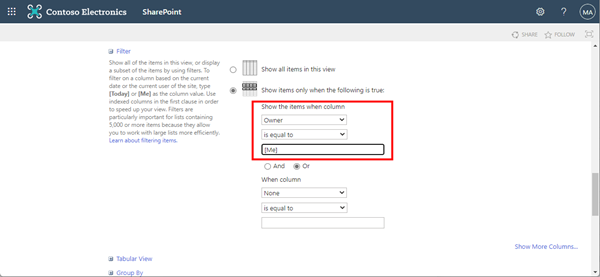
Scroll down to the filter and add the filter criteria Owner equals [Me], as here.
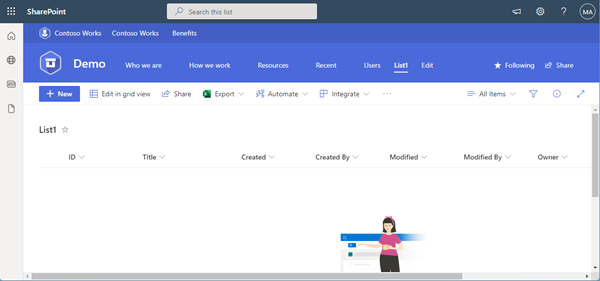
Do not forget to save the view at the page top or bottom with the Save button. As a result, you see... no more items.
The view works. The condition is not met, there are no items to show for the current user, which is the administrator in this case.
Step 3 - Remove existing permissions
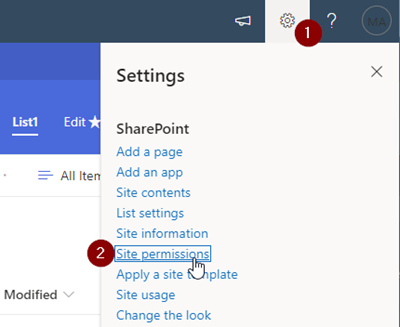
Now, open the Settings with the gear icon and Site permissions.
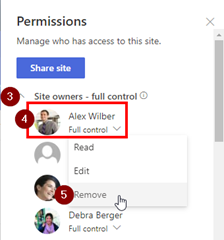
By default, usually users are members in the SharePoint site. Ensure that Adele and Alex are no longer member of the three default groups and remove them if they are existing in any of these groups.
This step is important. Repeat that for all users who shall be able to see only their data in List1. These users must be removed from the three default groups: Site owners, Site members, and Site visitors.
In my sample, I removed Adele and Alex from the site owners and site members group. When the users are removed, let´s continue.
Step 4 - Add a new role
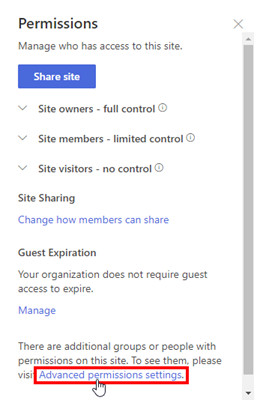
We now open the Advanced permission settings.
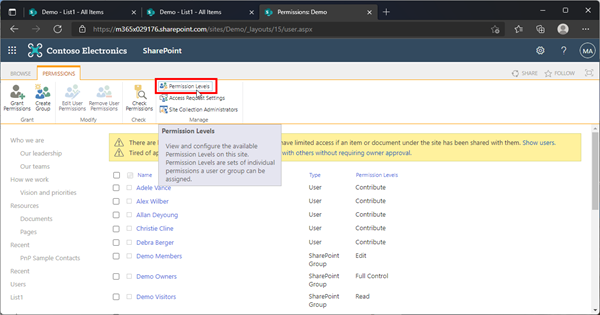
Open "Permission levels" from the menu.
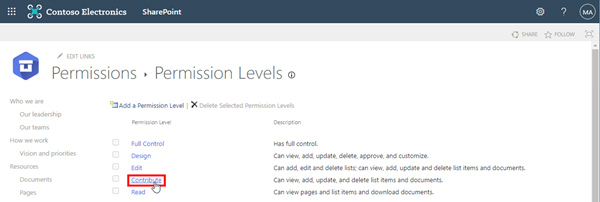
Now, we open the existing "Contribute" permission level. This is the easiest and fastest way.
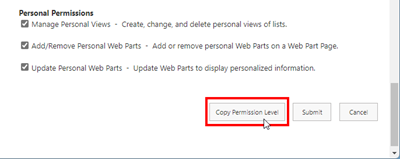
Scroll down and click on the "Copy Permission Level" button.
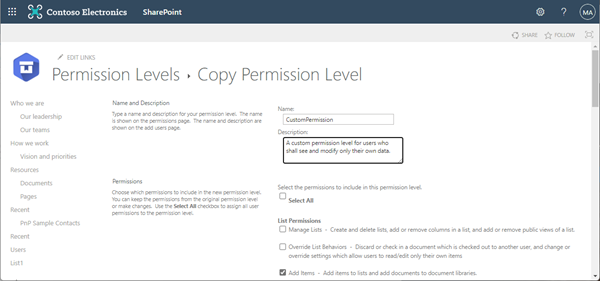
The copy opens. Add a nice name for the new permission level. Here, I use "CustomPermission".
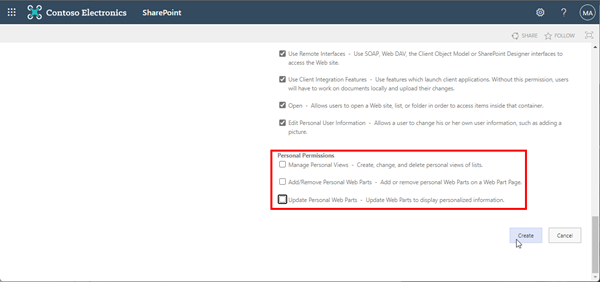
Scroll down and deselect the last three checkboxes in the section "Personal Permissions". We do not want that users with that role can manage or modify Personal Views. The reason is that if these users would be able to create a personal view, they would see all data in the lists and could workaround the existing view definition in All items. Therefore, the setting must be deactivated. Best, deactivate the last 3 permissions.
The other permissions are important for users to be able to contribute to lists (but can be customized if needed). Note that some settings must be set, e.g. to get the modern list experience, etc. Click Create when done.
We now have a custom permission we can use.
Step 5 - Apply the permission to users
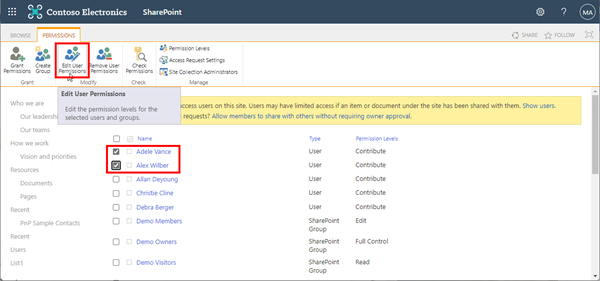
Go back to Permissions. In the list, select the desired users (here Adele and Alex), and open "Edit User Permissions" for the selected objects.
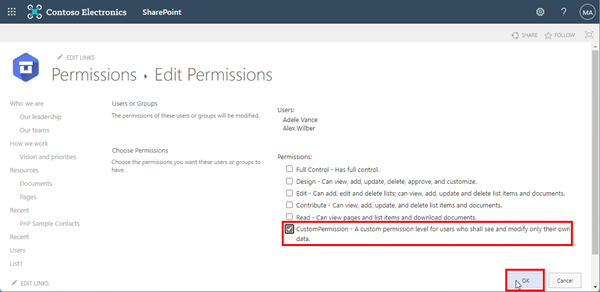
We can now apply the CustomPermission to these users. Select the new permission and click Ok.
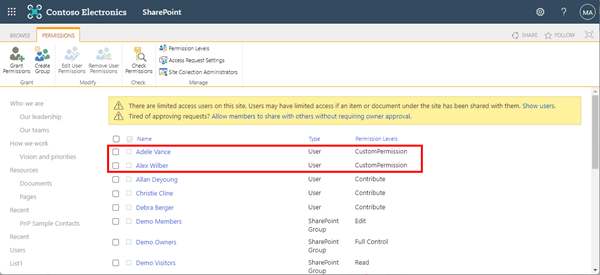
As a result, we see the CustomPermission set to our two test users.
Step 6 - Test with a user
Open another browser (best in In-Private mode) with one of the assigned users and navigate to the SPO site and to the list. In my sample it´s Adele, opening the URL of List1. As a result, Adele should see only "her" items: London and New York.
So, can Adele modify the settings or workaround to see more data?
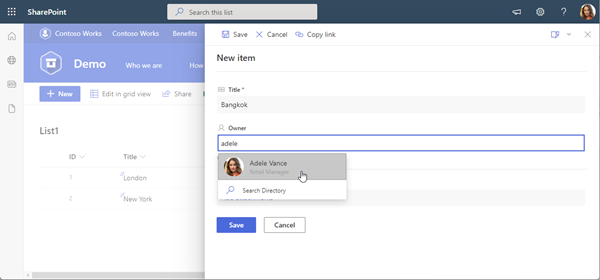
Well, when we check, we see that she cannot edit the default view All items, nor can she create new (personal) views. When she creates a new item, the owner must be set to her user, otherwise she would not see the new item. Therefore, the Owner field should be set to mandatory.
The same works for user Alex (but not for the other users with other permissions).
Step 7 - What about the others
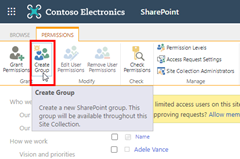
The recommendation here is to create a new SharePoint group, e.g. a CustomGroup and to set the permission level also to the CustomPermission level, as in this sample. Open the Settings / Permissions and Advanced Permissions, and click Create Group.
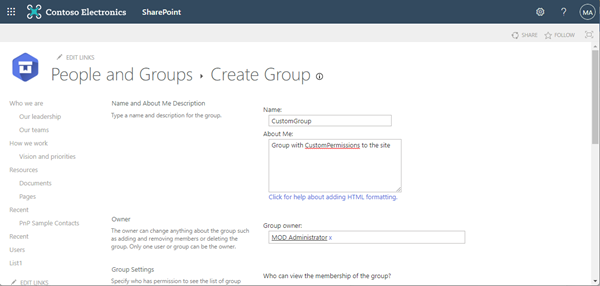
Then, enter a group name and description, like CustomGroup and scroll down.
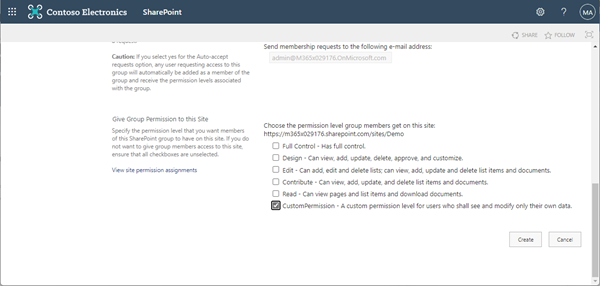
Select the CustomPermission at the end of the page.
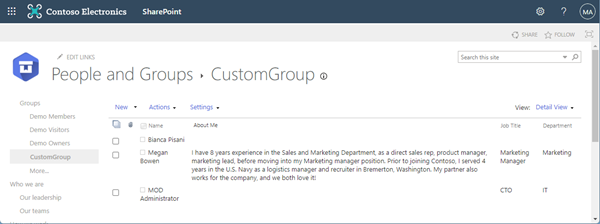
Add members. Here, two members have been added, Bianca and Megan.
Note: As above, ensure that these users are not already member of another group that gives more permissions than the CustomPermission level.
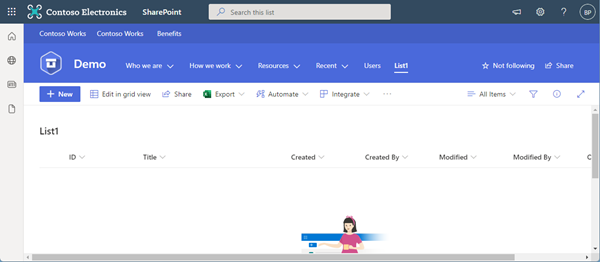
Try it. Here, we sign-in as Bianca. Again, she sees an empty List1.
Of course, the same rules apply to her. When Bianca adds herself as owner of a record, she sees that item (and the other users don´t).
Step 8 - What about the Admins
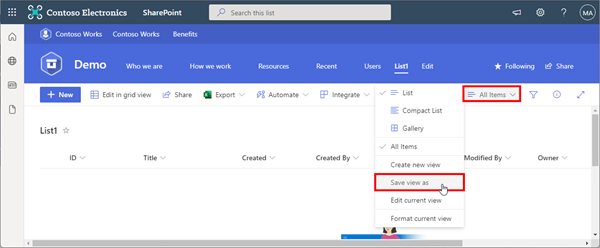
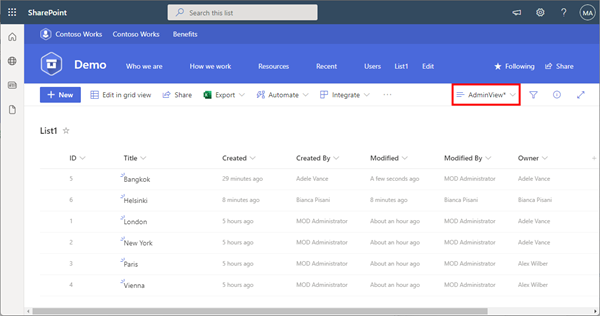
What if admins should see all items and they shall be able to modify owners? Well, admins have the option to create new views and to copy (Save as) views… Here, as administrator, we copy the existing All items view.
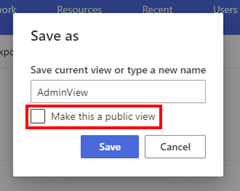
We add a name like AdminView and deselect the "Make this a public view" checkbox.
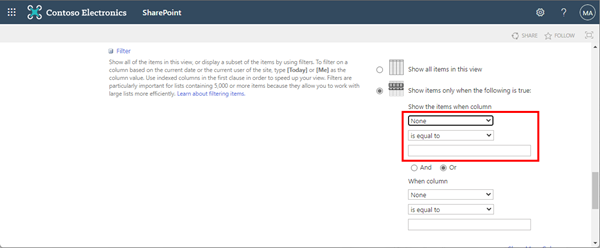
We can now simply edit this AdminView and remove the filter criteria Owner equals [Me], as here: Set the filter to None.
Then, click Ok. We now can see and modify all items again, e.g. to assign an item to another Owner, etc.
Because this is a private view for the administrator only, the other users cannot see this view and therefore not switch to it.
Security considerations
This method is good to quickly hide specific data that is stored in a list. It does NOT really protect data since the list does not show other data, but a direct link would: If a user opens one of his/her items, and copies the link, the parameter with the ID can be modified. So, the user can get access to other items by modifying the link and opening another item.
Therefore, it is the same here as always in IT: It depends. I like that approach for data that should obviously not be accessible and that can be hidden easily. In my scenario, the data is not really confidential, it is just supposed to be changed by different people. Each person can see their data in the list only, but there are no real security considerations if one person were to see other data. I think this quick solution makes sense for many scenarios with non-sensitive data.
If you are looking for a secure system, actually set individual permissions to items or use a different system such as Dataverse, App permissions or other storage systems with integrated security.
Summary
Mission basically accomplished! Working with views and permission levels in SharePoint / Microsoft lists is convenient and easy. Unfortunately, setting permissions to views is not possible and the filter expression only understands [Me] and [Today] placeholders in SharePoint. On the other hand, this is a simple workaround to hide specific items in a SharePoint list. This is also useful when using PowerApps that connect to SharePoint lists with the standard connector (with the included license!) to hide away data quickly.
I hope this step-by-step guide will help you perform custom access to list data and avoid the hassle of setting custom permissions at the item level.
Categories: Blog, Cloud, English, Governance, Microsoft, Microsoft365, Office365, Power Platform, SharePoint
Source: https://blog.atwork.at/post/SharePoint-Lists-and-permissions
