The Microsoft Operations Management Suite (OMS) delivers a great way to collect, analyze and monitor computer systems and services in your cloud and on-premises environments. Data is collected through agents and is saved to the OMS repository for further analysis. See here how this works for monitoring and reporting for Microsoft Office 365!
If OMS is new to you, check out the description of OMS in What is Log Analytics?.
If you want to learn more details and proceed step by step, check out this article Get started with Log Analytics
See the documentation of OMS here: Log Analytics documentation
To proceed quickly follow these steps.
The prerequisites
You need a Global Admin account for an Office 365 subscription and an Azure subscription.
Create a new OMS workspace
Login to the Azure Resource Manager portal https://portal.azure.com and click New. Search for "oms" and select "Log Analytics (OMS)" as follows.

When the description blade "Log Analytics (OMS) follows, click Create on the bottom. Now fill out the OMS workspace data, resource group, location an plan...
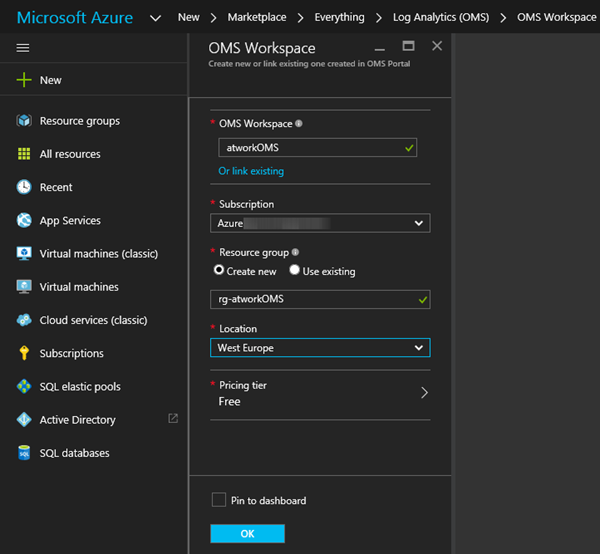
That's it. The resource group now contains the OMS workspace.
The costs
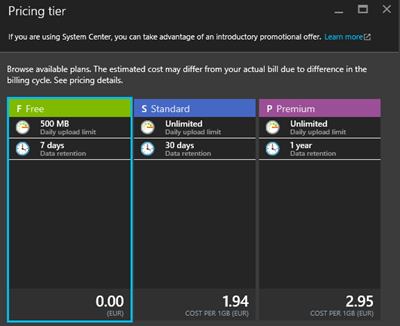
The Pricing tier can be changed in the configuration panel. Basically, the OMS service offers a free plan which is usually good enough for starting. The plan can be changed anytime. See the features and pricing below:
When opening the OMS workspace the blade shows all functions.
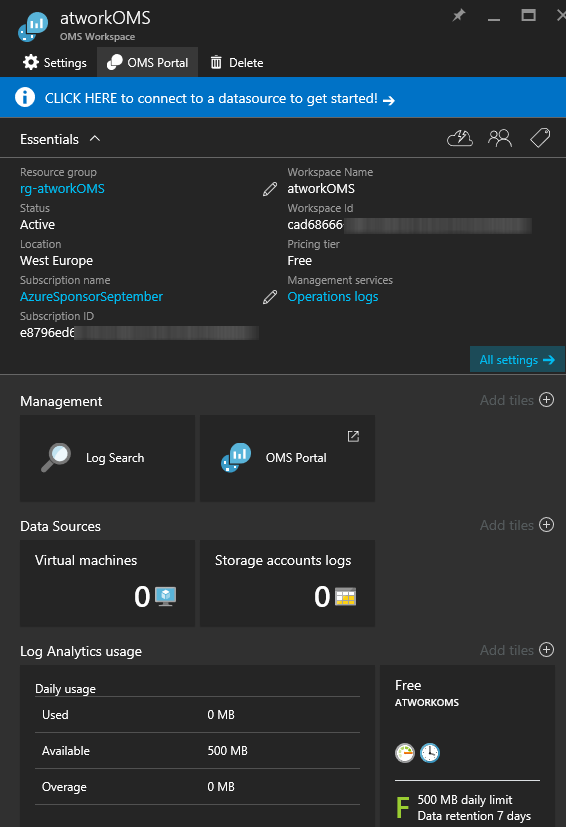
Switch to the OMS Portal
Open the OMS Portal. In here, multiple workspaces can be managed. The current workspace is shown in the upper right corner.
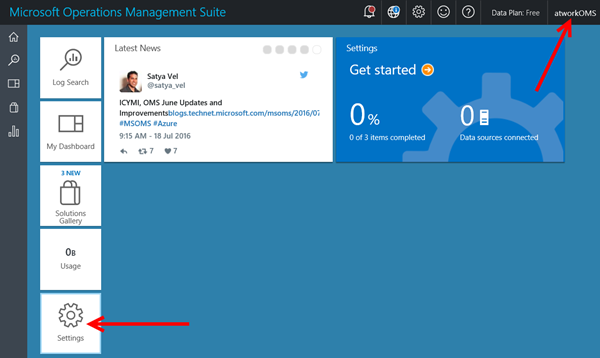
The URL of the OMS portal includes your workspace, as in my sample:
https://atworkoms.portal.mms.microsoft.com/#Workspace/overview/index
Add Office 365
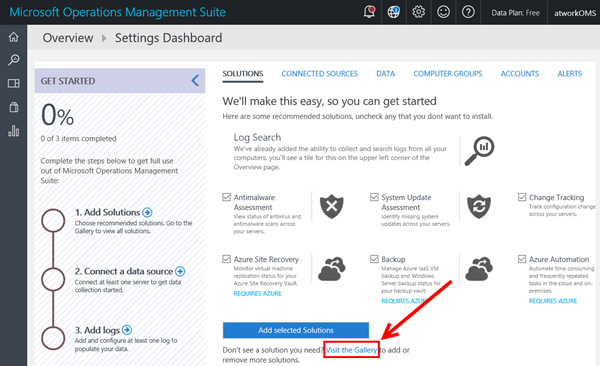
In the OMS Portal, click Settings. In the Settings Dashboard, click the "Visit the Gallery" link on the bottom.
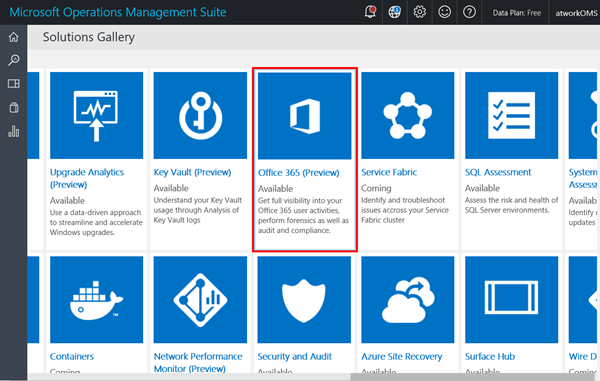
Now you can scroll to the right and add the Office 365 (Preview) solution.
(As you can see, there are some interesting solutions available...)
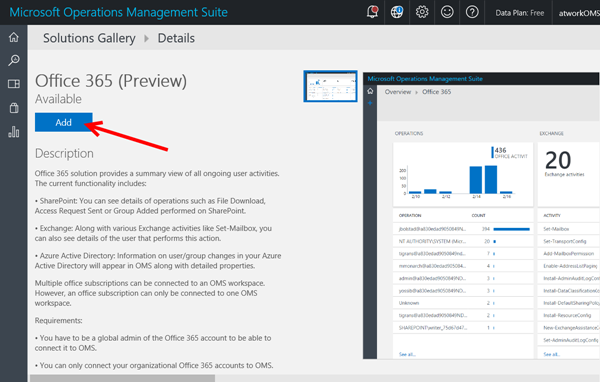
Currently, the Office 365 solution is in Preview. Then add the solution.
Finally, we need to bind an Office 365 tenant to the OMS workspace:
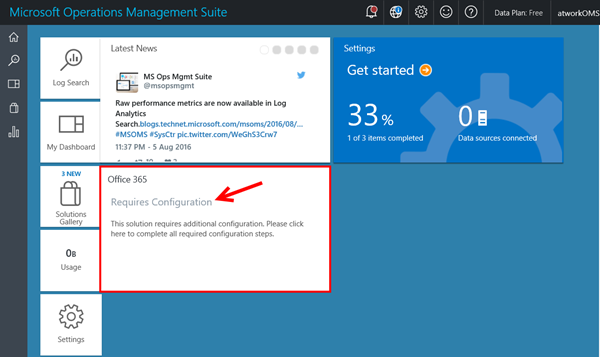
Click "Requires Configuration" in the dashboard. Now scroll to the right (!) and click "Connect Office 365".
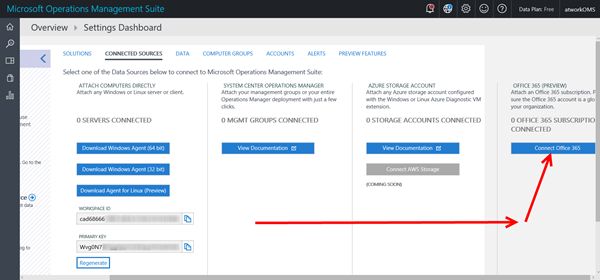
Login with a global admin of your Office 365 tenant in the popup window.
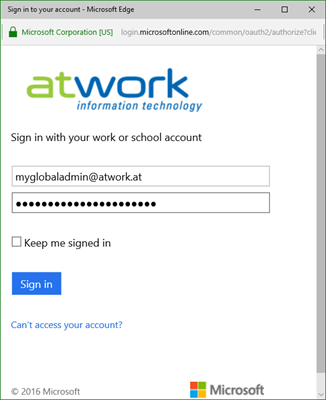
If it was successful, a message says: "You've successfully onboarded your Office365 subscription of ID '***' to your workspace. Please close this window to continue."
Be warned: If you have this Office 365 subscription already connected to another OMS workspace, the config doesn't allow to bind the Office 365 tenant more than once ("This subscription is already linked to another OMS workspace. Please select a subscription that is not yet linked to an OMS workspace. Please close this window to continue.").
Now it's time to ... wait. It can take some minutes up to 4 hours that data collection has started.
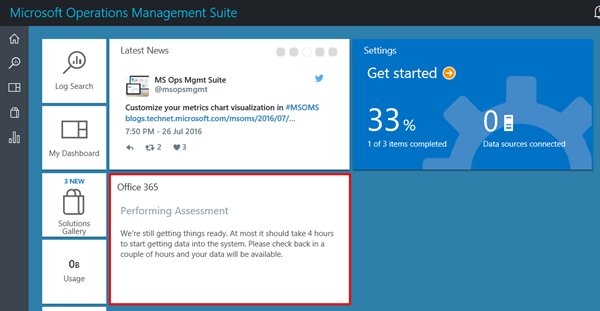
In my case it took about 15 minutes, then results were shown. Lean back and relax...
See part 2 and how the collected Office 365 data is analyzed!