Since I use PowerApps only from time to time, I wanted to document some common actions, such as working with images and the camera control. So, here are my little notes in 6 tips.
Well it´s Saturday evening, and I am listening to fancy music and playing with PowerApps (and Flow, Cognitive Services and Adaptive Cards). To not forget the following basics, I thought, it´s a good idea to document a quick intro for working with the Camera control and pictures in PowerApps.
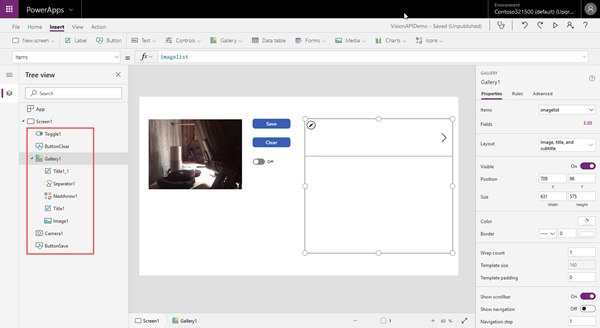
My setup is simple: A blank PowerApp in Tablet Mode with the following controls from left to the right: Camera1, ButtonSave, ButtonClear, Toggle1 and Gallery1 as in this screenshot.
First note: Select the camera
If your computer has more than one camera (as I have an internal camera in my notebook and an external USB camera attached), the Camera property Camera can switch between the devices. By default, Camera = 0. To switch to the second camera, change it to Camera = 1 in the control properties and so on. To allow a user to switch in his app, add a Toggle control and modify the Camera property Camera = Toggle1.Value as shown here (of course, if you have only two devices).
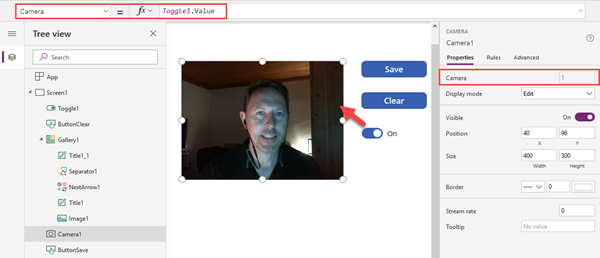
In my setup, the internal camera shows the background of my monitor and parts of my desk (see app design #1 above), while the second camera is attached to my monitor and directed to me (design screen #2).
Second note: Take a picture
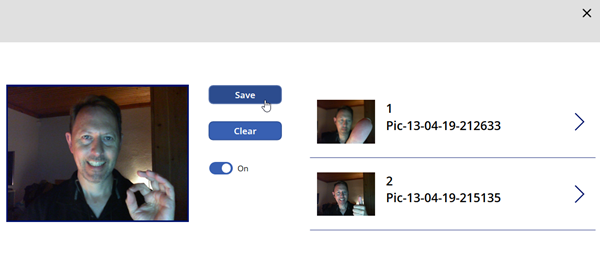
Click or tap ON the picture in the camera control to shoot a picture. To visualize that, I took a snapshot of my finger tapping...

You wont see anything changing in the Camera control itself. More on that below.
Third note: Work with the photo
Once a picture is "frozen" (a snapshot has been taken), we can access it with the Camera1.Photo property. To save multiple pictures, it´s handy to save them to a collection. I wanted to save an Id, a title and the photo to a collection named imagelist, so I used this formula to save a picture with a timestamp and a virtual Id:
Collect(imagelist,{id:Max(imagelist,id)+1,Title:"Pic-"&Text(Now(),"[$-en-US]dd-mm-yy-hhmmss"),Photo:Camera1.Photo})
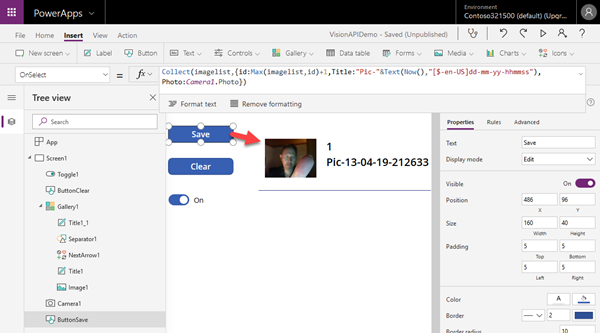
I did simply run the app and clicked on the Camera1 control and the Save button to create and fill the collection with at least one photo. When the collection exists, I can bind the Gallery1 Items to that imagelist as shown here. Add controls as required, I just added my three collection items Id, title and the photo.
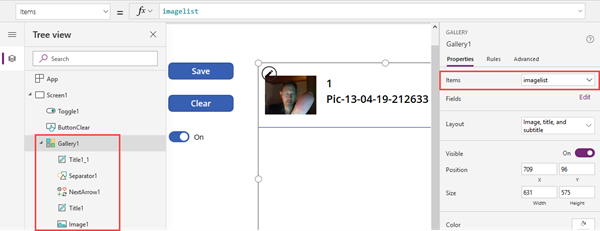
To clear the collection with the Clear button, I added Clear(imagelist).
To test it, I added multiple pictures by clicking on the camera for a snapshot and then on the Save button to fill the list on the right.
Fourth note: Upload a photo to SharePoint Online
We´re not done yet. Another goal is to save an image to SharePoint Online. When working with images and SharePoint, there are two things to know:
- The SharePoint connector currently works with pictures and the Picture Library AFAIK, and
- Images must be transformed from the delivered Base64-encoded image to a Binary-encoded image.
So, let´s add a Flow to a new ButtonUpload. We get data with the "Ask in PowerApps" feature. First, a SharePoint Create File action is added with the connection to a PictureLibrary. Then, a Data Operation Compose action is inserted to convert the picture to binary format as here.
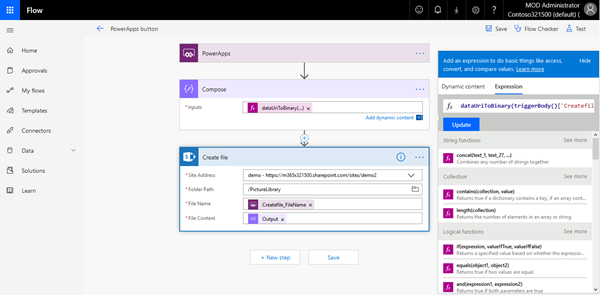
The key here is to convert the image with the following function in the Compose expression:
dataUriToBinary(triggerBody()['Createfile_FileContent'])
The PowerApp needs to deliver the image as "Createfile_FileContent" parameter that´s transformed here in a binary stream for storing as file. Then, the Compose Output is used for the file creation in the next step. For a detailed description, I found a step-by-step documentation at the Emtec blog team - thanks, guys!
When the Flow is completed, we simply need to execute it with a button, and pass some data as here:
PowerAppsbutton_1.Run("pic1.png",Camera1.Photo)
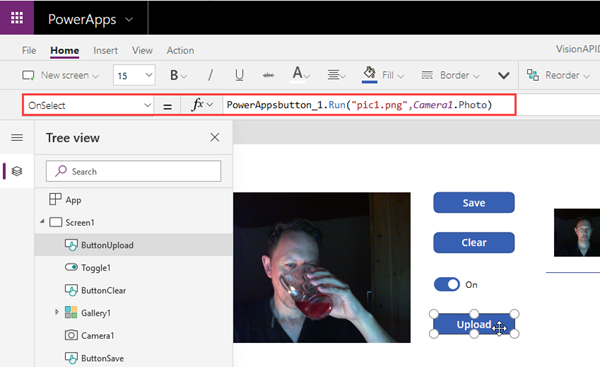
I did the Flow twice, so I have that pretty name "PowerApps_1" in here, but for this demo, I leave it like this. BTW, this is not red wine, but home made lemonade...
Run it, click the Upload button and see the result in the SharePoint PictureLibrary.
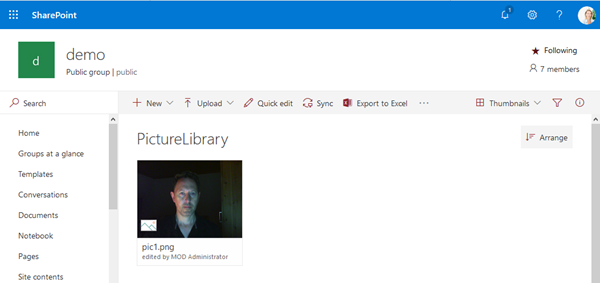
This allows to work with SharePoint and pictures out of the box with very little effort and No-Code.
Fifth note: Play with pictures
At the end, I wanted to select a "saved" picture from the collection and upload it to SharePoint. So I modified the PowerApp a little bit and added TextInput1 and Image2 and repositioned the Upload button. The idea is to select a picture by clicking on the row and then upload it to SharePoint with the Upload button as here.
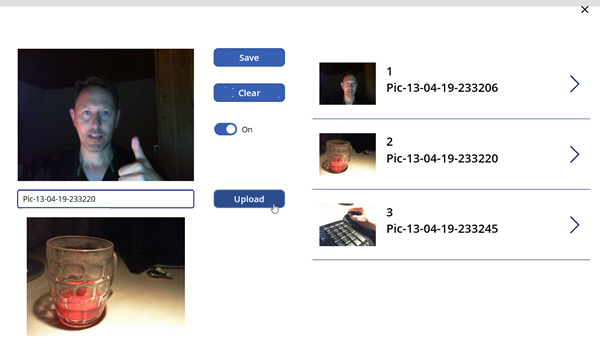
The design mode shows the modifications: First, the OnSelect of Gallery1 writes the selected item to two variables with the following formula:
UpdateContext( { title:ThisItem.Title, picture:ThisItem.Photo} )
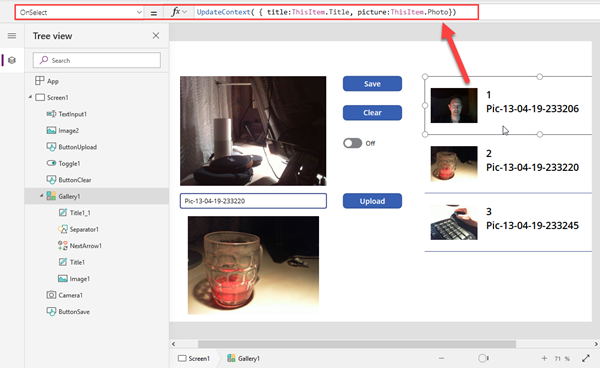
Now, TextInput1.Default needs to show variable title and Image2.Image needs to show picture in their visualization properties as here.
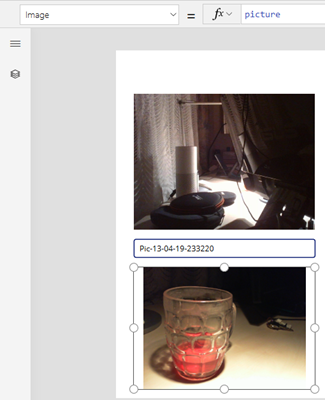
If a user clicks on a row in Gallery1, these two controls show the selected content. Now, let´s finish by changing the Upload button event:
PowerAppsbutton_1.Run(TextInput1.Text&".png",Image2.Image)
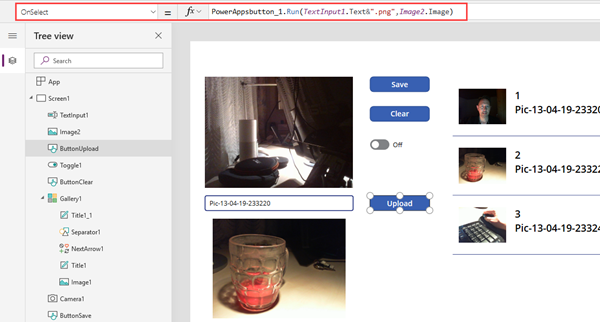
Then I did run the app, selected an image from the list and clicked the Upload button to start the flow. After the flow did run, here we go in SharePoint.
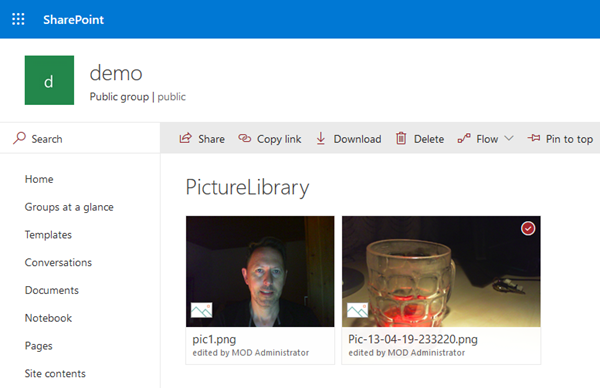
In my demo, the upload process and running the flow took just some seconds until the selected image showed up in the PictureLibrary.
Sixth note: Display pictures from SharePoint
At the end, how to get pictures from a data source like SharePoint? So, I added the SharePoint Picture Library as data source and added a second screen with Gallery2. Well, you cannot select the data source Picture as Image source of the control... Then, a tip from Mikael saved me: How to display images from a SharePoint library in PowerApps. It´s important to mention, this currently only works in the web version of PowerApps and not on devices. In the article´s comments there is helpful info, e.g. by Paul and by Bruce and an article at Display SharePoint images on mobile devices in a Canvas PowerApp to check out.
Anyway, here´s the solution for the binding: I can use the following expression for showing the picture in the Image property as shown below: '{Link}'
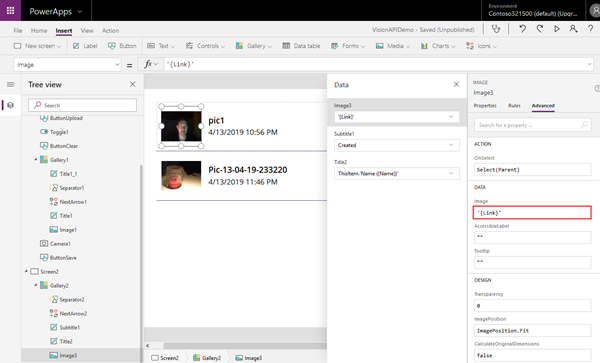
Then the Image is using the Picture object from SharePoint and renders the image as expected. Again, this currently only works in the web version and that´s a quick workaround. I hope, this will be solved better in the future, but this method works. Alternatively, workarounds are available with external solutions as Flow or, of course, custom connectors (as we did for some solutions).
Have fun with the Microsoft Power Platform
So, easy going with PowerApps. This article shows how to work with images in PowerApps and how to perform basic operations. If you want to go deeper with the Microsoft Power Platform, I recommend the following blogs of my fellow MVP colleagues:
Of course, there is so much more information out there, so the official channels at

Have fun with PowerApps and images!