Calling scripts from an Automation Account in a Logic App is particularly useful when the tasks to be performed are too complex to implement directly in a Logic App. It is also useful when scripts need to be reused multiple times without rewriting them in each Logic App. See how to enhance your Logic Apps with Automation Account Scripts.
Such an integration allows for centralized management and updating of scripts to ensure consistency and maintainability. Finally, it is useful when advanced functions and modules available in PowerShell or Python are needed.
Follow these steps to call a script in an Automation Account from an Azure Logic App:
- Create an Azure Logic App. For testing, an HTTP trigger is sufficient. No further actions are needed initially. Save the Logic App, for example, with the name “Run-Script.”
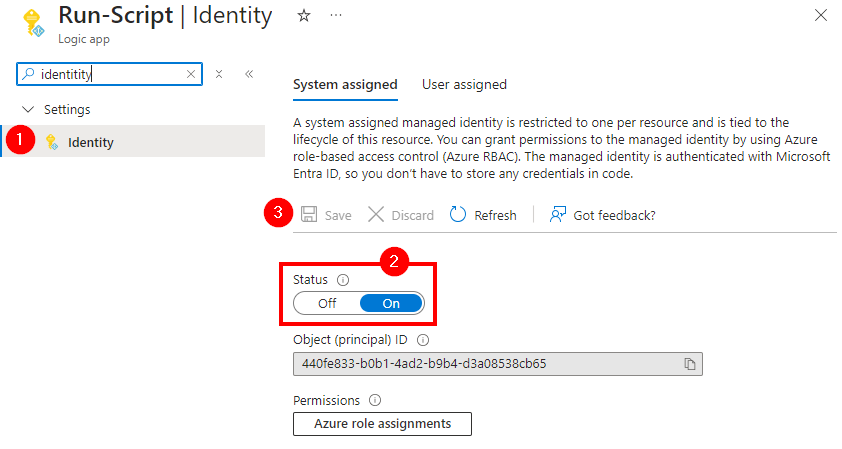
- Enable the System assigned Managed Identity for this Logic App in the Identity menu.
- Create the script in the Automation Account. Parameters are usually passed to the script, and the script may return a result. You can use the following script as a framework.

 # PowerShell Demo Script in Automation Account
 # Run this script from an Azure Logic App with the action "Create job" and a Managed Identity

 param (
 [String]$myparam
 )

 Write-Output "myparam: $myparam"
 # Do something...
 $out = "The result of this script run with $myparam"

 return $out
- Customize the script and then click the Publish button to activate it. We do not need a webhook but start the script via a custom Logic-App action.
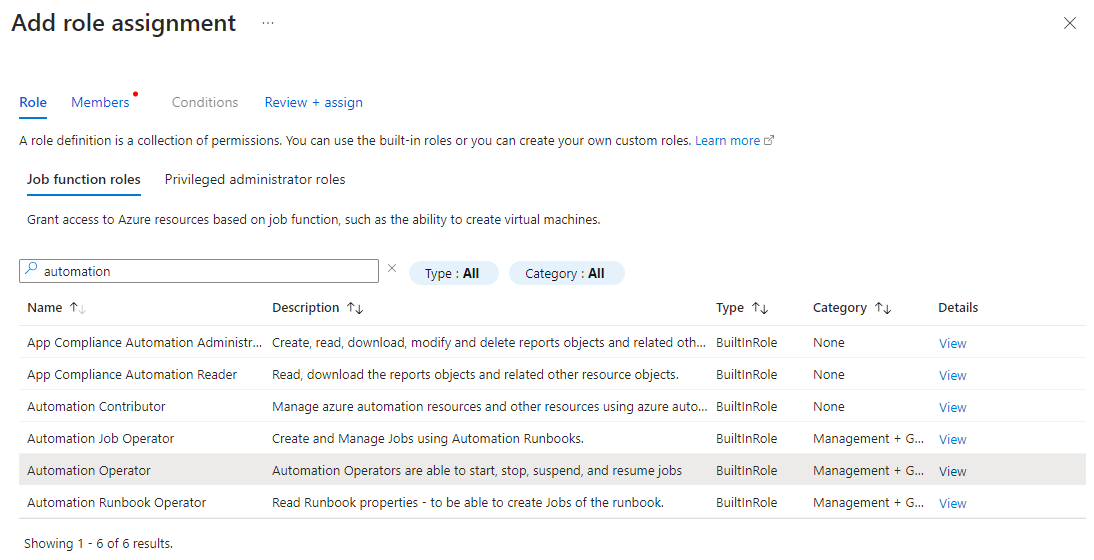
- Authorize the Logic App to start the script. Authentication is done via the Managed Identity. In the Automation Account, select the Access control (IAM) menu, click Add, and then Add role assignment.
- Search for “automation” and select “Automation Operator.” This role allows, among other things, to start scripts. So we are adding permission to start a script in the Automation Account.
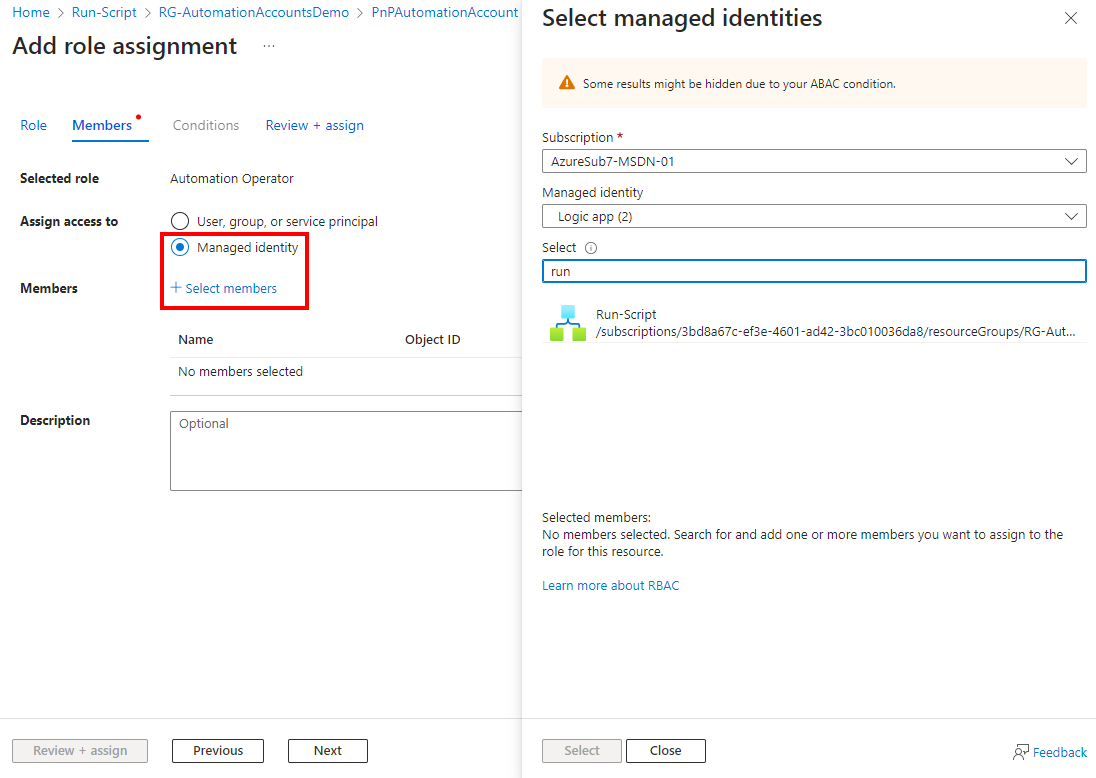
- Select “Managed identity” in the Assign access to section and then click “Select members.”.
- In the right pane, select the subscription, “Logic app,” and the Managed Identity of your Logic App. In this example, the Logic App is called “Run-Script.” After selection, click “Select.”
- Confirm the assignment with “Review + assign,” and again to create it. This grants permission for the Logic App.
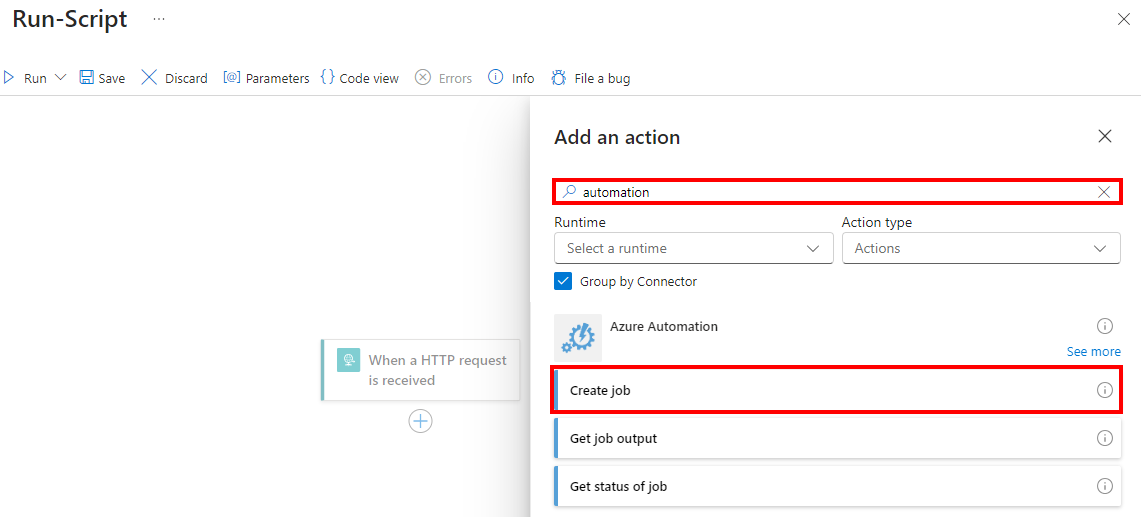
- Open the Logic App editor and add an action after the trigger. Search for “automation” and select the “Create job” action from the “Azure Automation” group.
- Select the location of the Logic App. This includes subscription, resource group, automation account, and of course, the script to be started and any parameters.
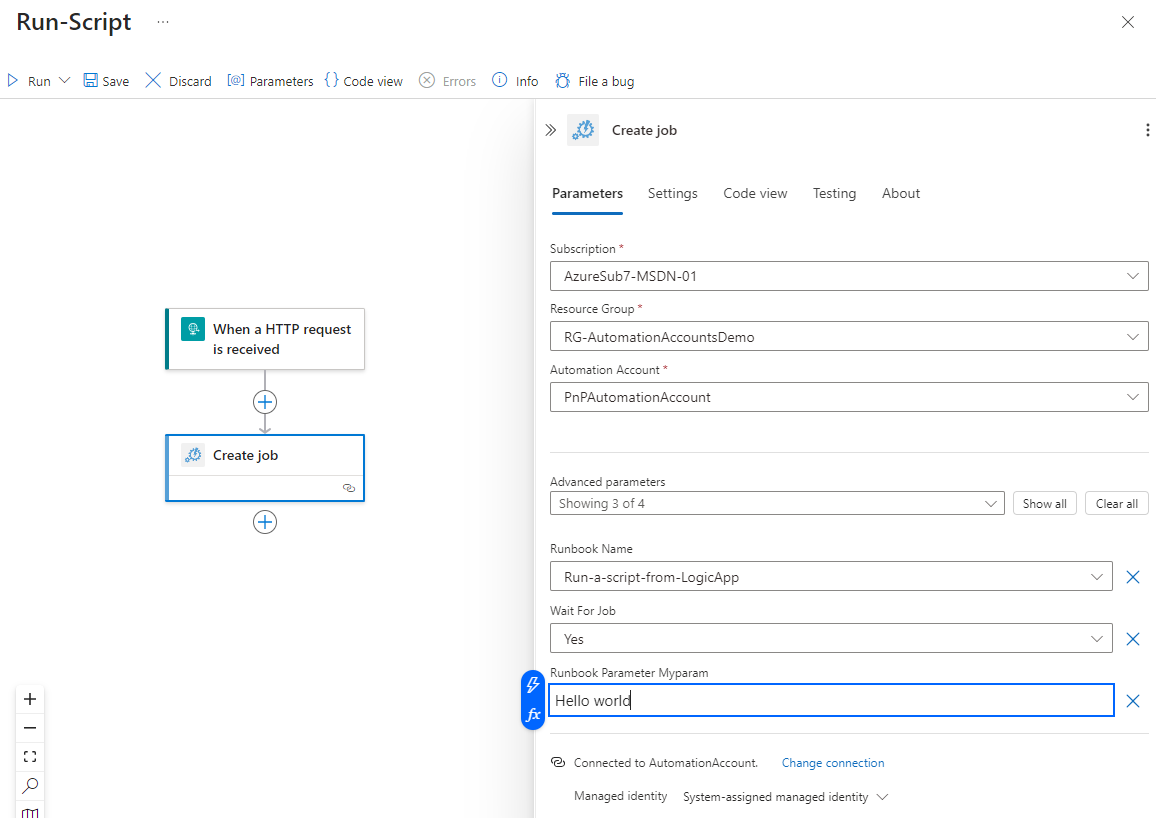
- Decide whether the Logic App should wait for the script result or not. “Wait For Job” controls this behavior. If you want to work with the script result, set this to “Yes.”
- Setting the properties creates a new API connection “azureautomation” with the Managed Identity in the resource group. This can be used for further actions and Logic Apps as usual.
- Optionally, process the result further, for example, in a variable or similar actions.
- Configuration is complete. When you start the script, you should see the success of the action in both the Logic App and the Automation Account script.
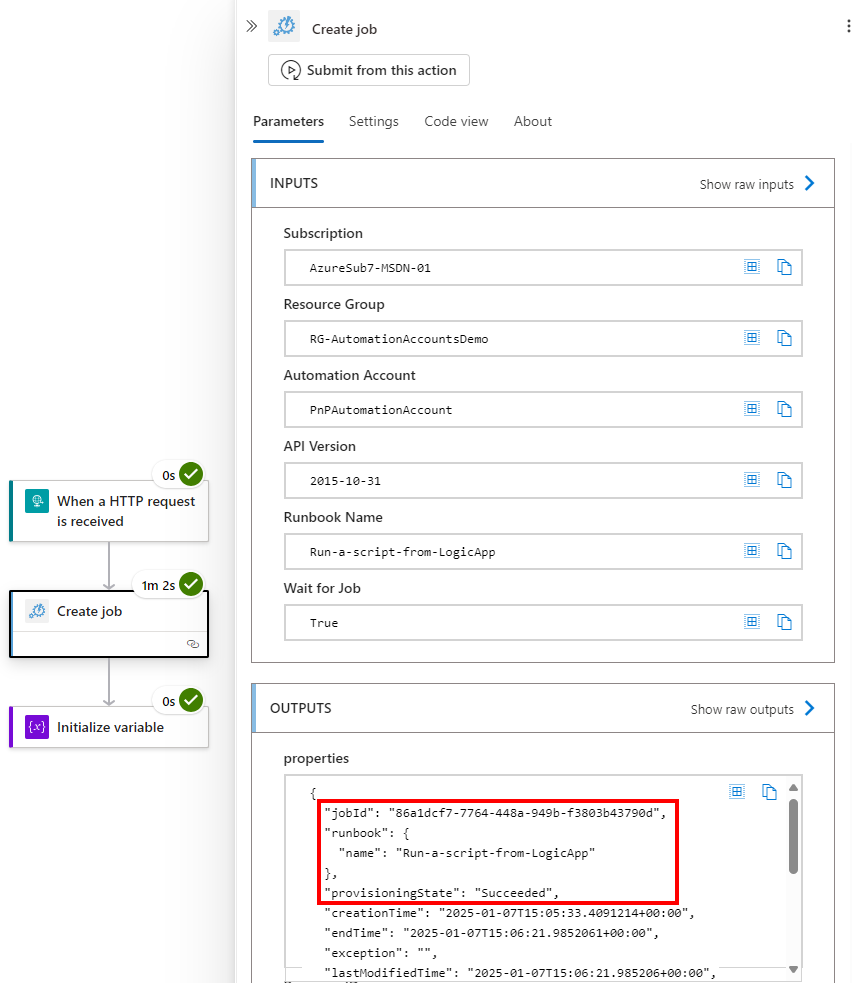
- The returned Job ID is the key to obtaining further data from the script’s runtime environment, such as a returned value.
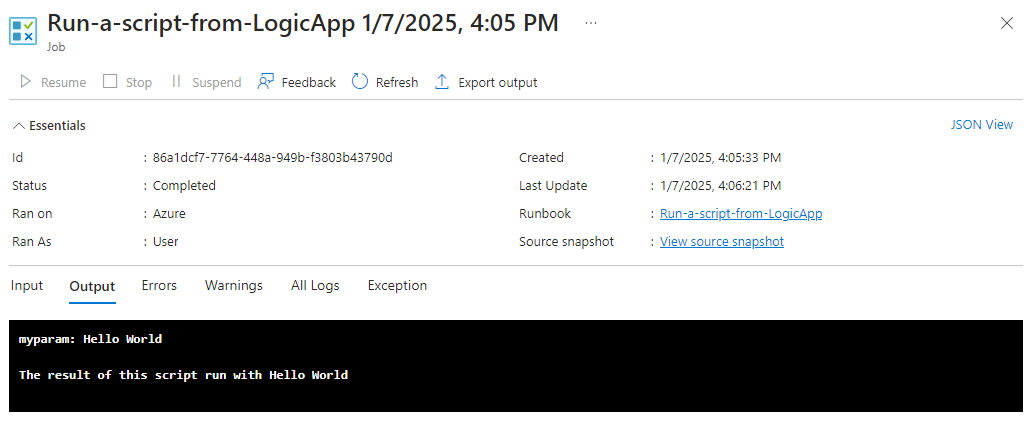
- In the Automation Account, you will see the output—if the script provides one—the runtime, success, and other runtime data. Any script errors will also be displayed in the exceptions.


With this example, you can establish the connection between Logic Apps and scripts, for example, to use scripts with Azure or M365 PowerShell modules and similar. Using scripts can thus simplify automated tasks.
Note that calling a script from another resource may take a bit longer until it is available and the script has been processed. Like other actions in Logic Apps, timeouts and asynchrony can be set for the Create job action, as well as waiting for the script result.
Happy coding!