Managing administrators in Delegate365 is straightforward and gives you full control over permissions, scope, and responsibilities. This short guide walks through the process step by step.
1. Open Delegate365
Sign in to your Delegate365 portal - usually the web address is https://[yourcompany].delegate365.com. If you have just completed the setup, use the account that was used during the setup process. This account is automatically assigned as the first administrator with the Portal Administrator role.
This initial administrator is intended for setup and for creating additional Portal administrators. By default, Portal administrators can configure Delegate365 and enable its usage for other Portal Administrators and for Scope Administrators.
2. Open the Administrators Module
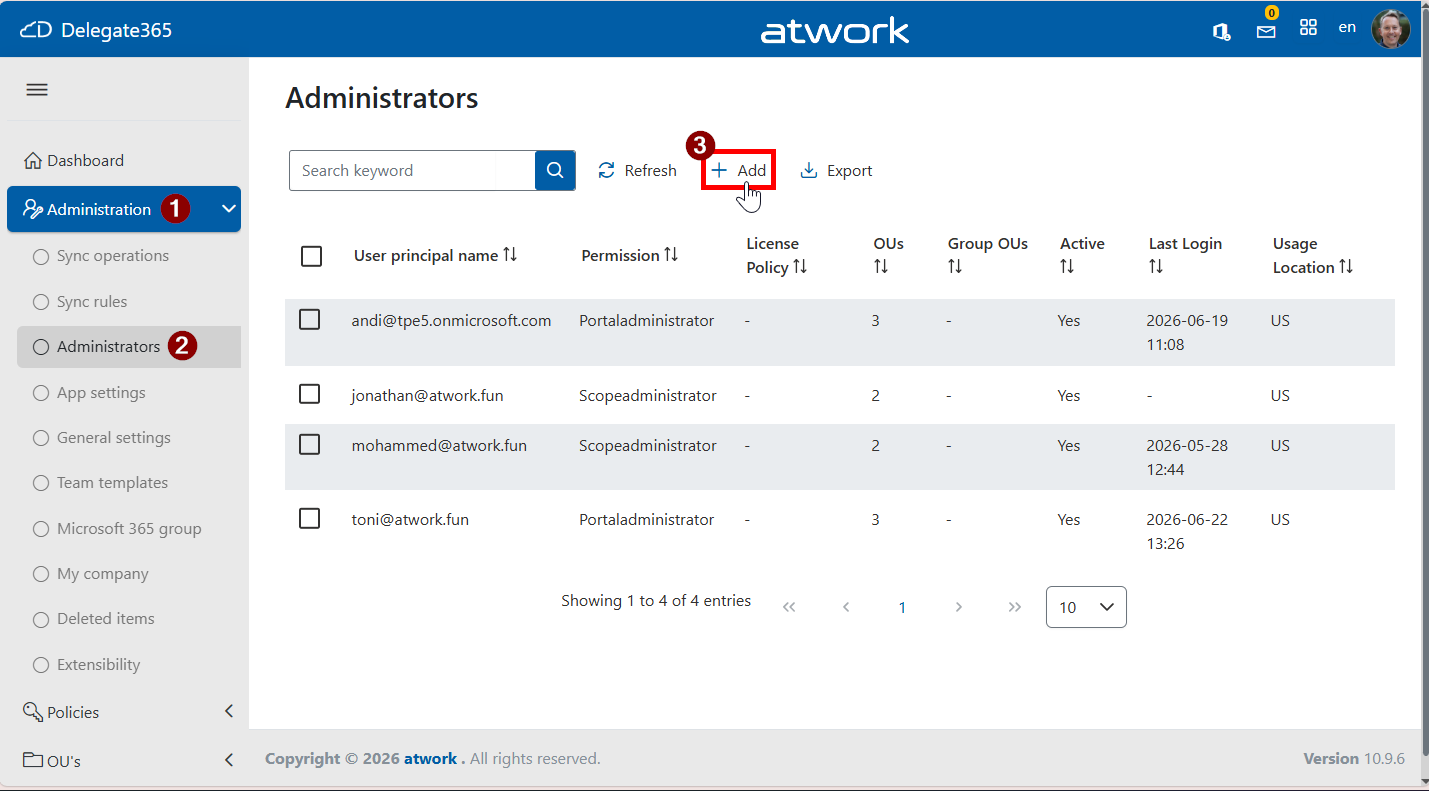
- Navigate to Administration / Administrators in the left menu.
- You will see the list of existing administrators with their permissions, assigned OUs, and activity details.
- Click Add to create a new administrator.
3. Select the User and Define Core Settings
- In the Add administrator panel, start by selecting the user (User Principal Name). Note: you can even add external users with their own work account. Then define the basic configuration:
- Usage Location is required for licensing and service availability
- Permission Policy defines the admin role (e.g., Portaladministrator or Scopeadministrator).
- Role Portaladministrator is predefined for users who configure Delegate365.
- Role Scopeadministrator is for the “users” of Delegate365 who only get access to their specified resources.
- However, Portaladministrators can define their own roles in module Policies / Permission Policies anytime.
- License Policy – optional, depending on your setup. For initial setup, leave it to (No policy).
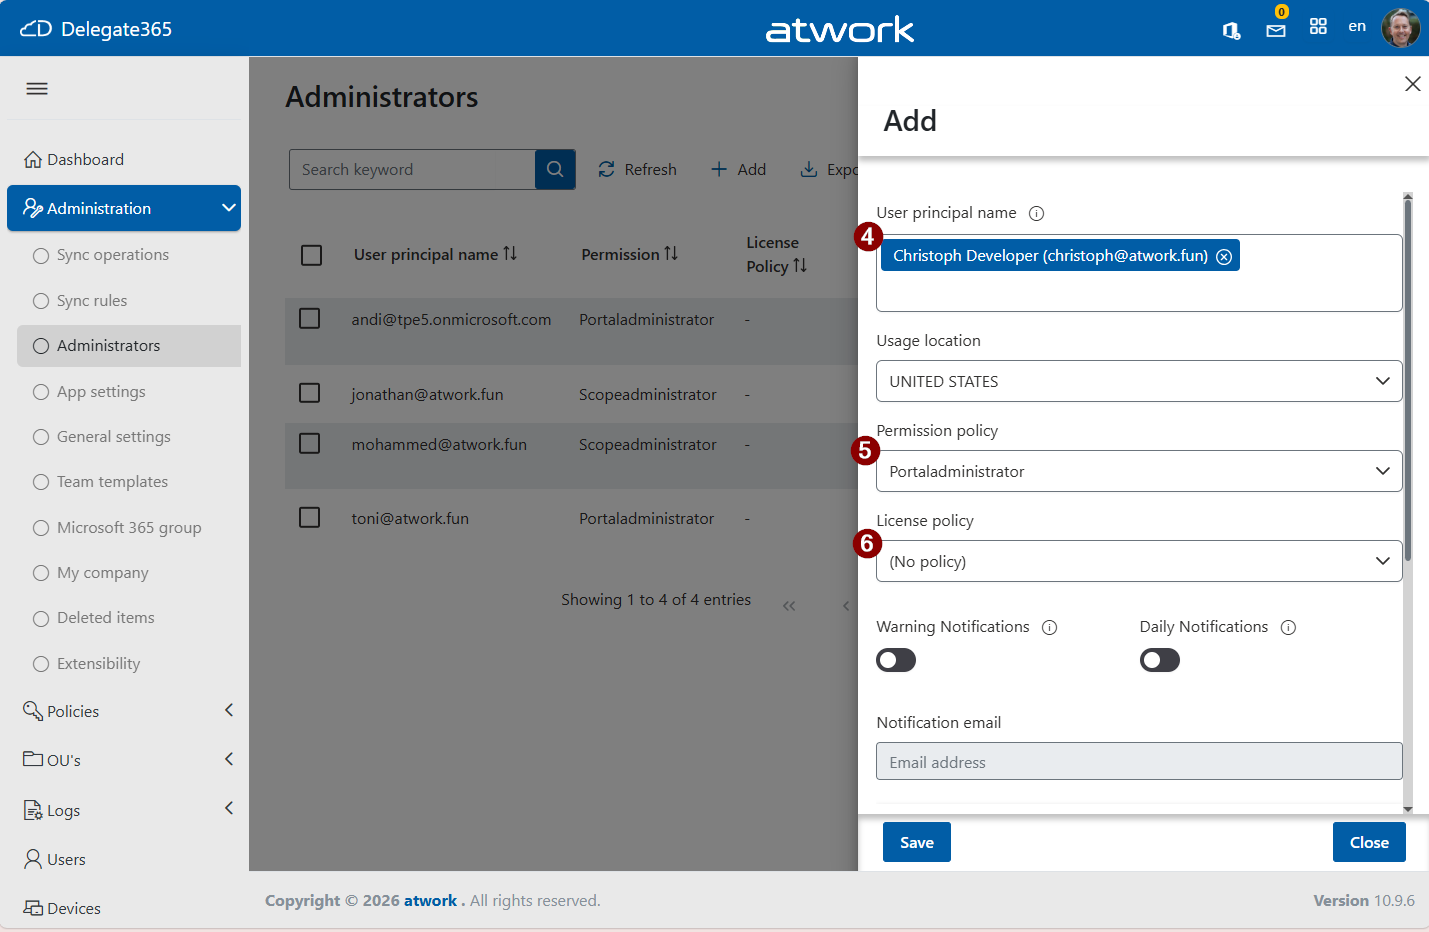
These settings determine what the administrator can do and which policies apply.
4. Configure Scope and Notifications
Next, define where the administrator should have access - this is important for the administrator to see assigned users and other resources.
- Add admin to domain – assign one or multiple domains
- Add admin to OU – restrict access to specific organizational units
Optional settings:
- Warning Notifications informs about issues or policy violations
- Daily Notifications provides regular updates
- *Notification Email target mailbox for alerts
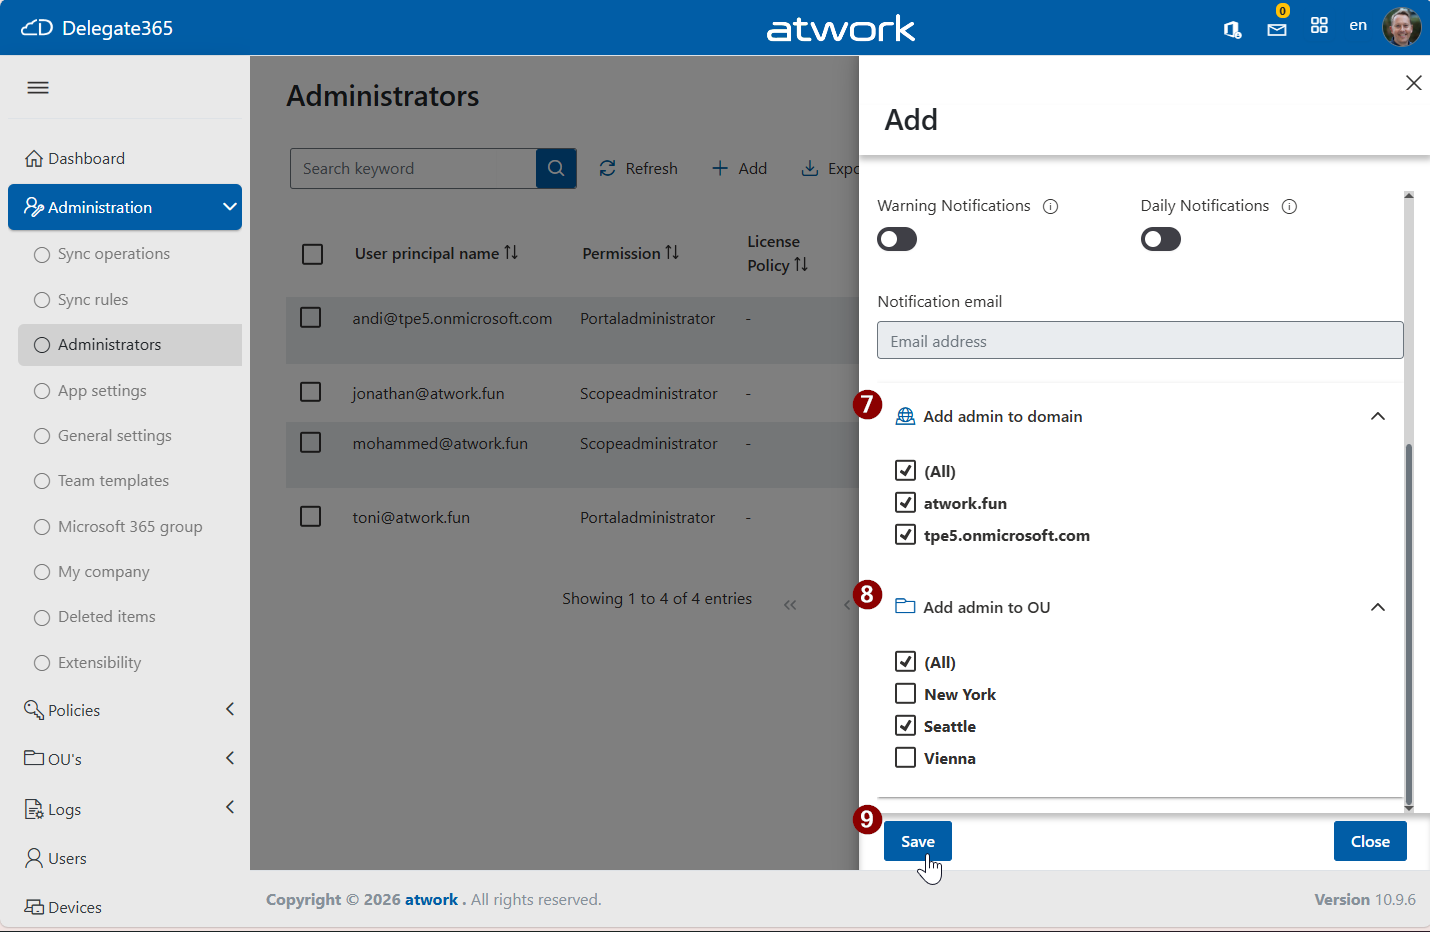
This step is key to ensuring least-privilege access and proper governance.
5. Save the Administrator
- Click Save to create the new administrator.
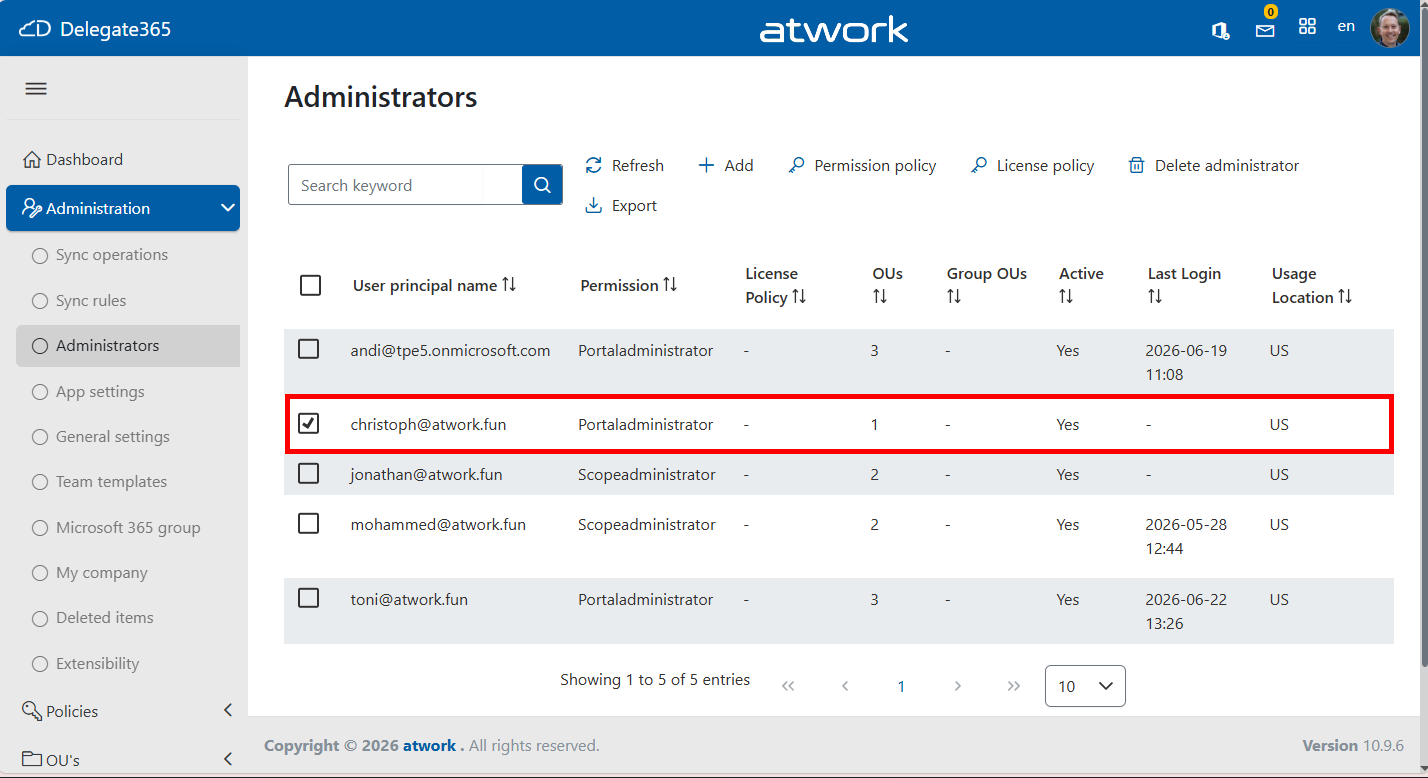
- Once completed, the new entry appears in the list with the configured permissions and scope.
Notes
This assignment becomes effective immediately. The administrator can now sign in to Delegate365 and perform actions based on the assigned policies, as well as the configured domain and OU scope.
Administrators can also be temporarily deactivated if they should not be able to sign in for a certain period. If access is no longer required, we recommend deleting the administrator instead.
If an administrator is not able to see his assigned resources, like users, check out this article:
Troubleshooting Delegate365
Summary
Adding an administrator in Delegate365 involves simple steps:
- Open the Administrators section
- Configure user, permissions, and policies
- Define scope and save
Administrators can also be temporarily deactivated if they should not be able to sign in for a certain period. If access is no longer required, we recommend deleting the administrator instead.