YOLO stands for “You Only Live Once.” In Visual Studio Code, YOLO mode is a powerful productivity feature that transforms Copilot from a simple assistant into a more autonomous coding agent. Learn how to enable YOLO mode in Visual Studio Code.
Without YOLO mode, developers must explicitly review and confirm every action the agent proposes, such as running terminal commands or invoking tools. While this ensures full control, it can interrupt the workflow and slow down development.
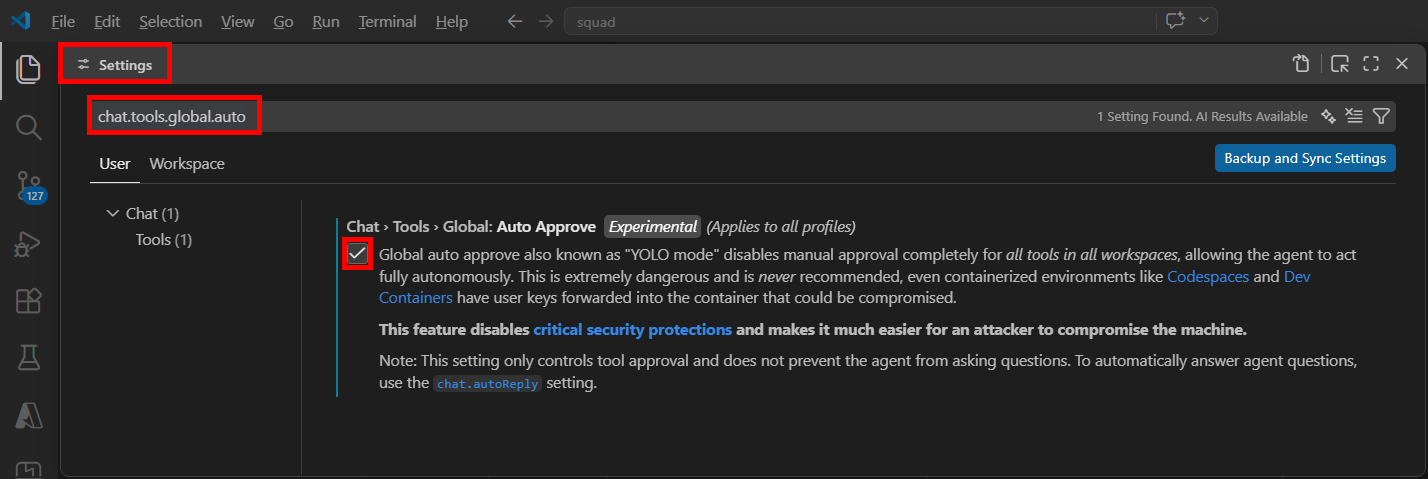
Enable YOLO in the UI
In VSCode:
- Open the Command Palette by pressing Ctrl+Shift+P (or F1 in Windows).
- Type settings. Select Preferences: Open User Settings..
- Type chat.tools.global.auto (or navigate to User / Chat / Tools…)
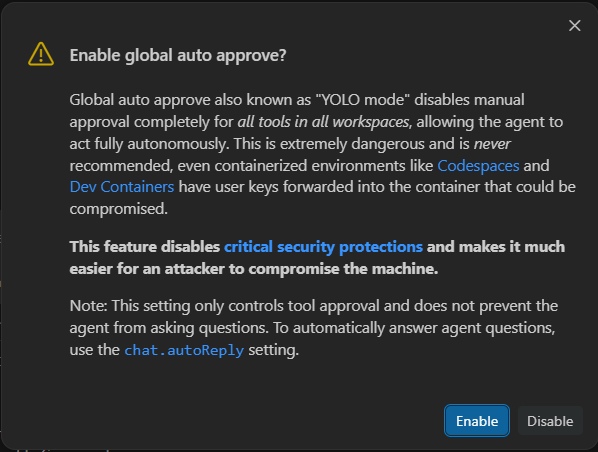
- Select the switch Global auto approve also known as “YOLO mode” disables manual approval completely…, as here:
When using an agent, confirm once to enable YOLO mode.
Done.
Configure YOLO in settings
If you want finer control over allowed actions, check out this guide on configuring settings.json.
Auto-approve specific terminal commands
See the various autoApprove configuration settings in settings.json:
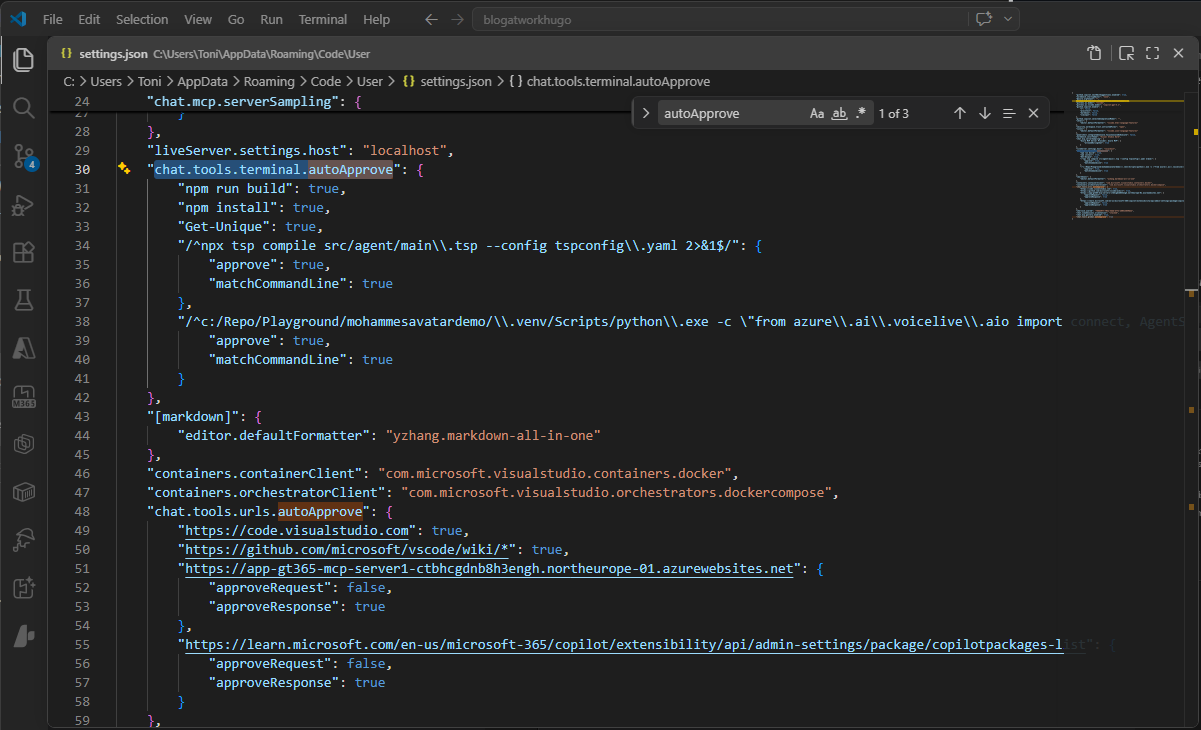
For example, developers can define allow/deny lists using regular expressions to automatically approve safe commands (e.g., git status, npm install, etc.) while explicitly blocking risky operations like file deletion or system changes.
Speed up your development using agents
Overall, YOLO mode is a useful productivity feature that automates GitHub Copilot actions and reduces the need for constant confirmations. However, its safe use depends on carefully configured guardrails balancing speed with control and security.