PowerShell is both a command-line shell and scripting language and perfect for automating administrative tasks. When working with Microsoft Azure, Microsoft recommends to use the new Azure PowerShell Az module. See how to uninstall the outdated Azure PowerShell AzureRM , how to install the new Az module for PowerShell 5.x and 6.x and how to connect and to get a inventory of your resources and a little bit of Cloud Shell here.
Azure PowerShell "Az" is the successor of "AzureRM"
For working with Azure PowerShell, the AzureRM module is outdated. AzureRM is still officially maintained and will get bug fixes up through December 2020, but Microsoft strongly recommends to switch to the Az module.
The new Azure PowerShell Az module is available since December 2018 and, as the documentation says, offers shorter commands, improved stability, and cross-platform support since it's running on the .NET Standard library which means it runs on PowerShell 5.x and PowerShell 6.x (PS 6.x can run on Linux, macOS, and Windows). I see, "Az" is shorter than "AzureRM"… ![]()
Anyway, Az also offers feature parity and an easy migration path from AzureRM. See more at Introducing the new Azure PowerShell Az module.
Uninstall Azure PowerShell AzureRM
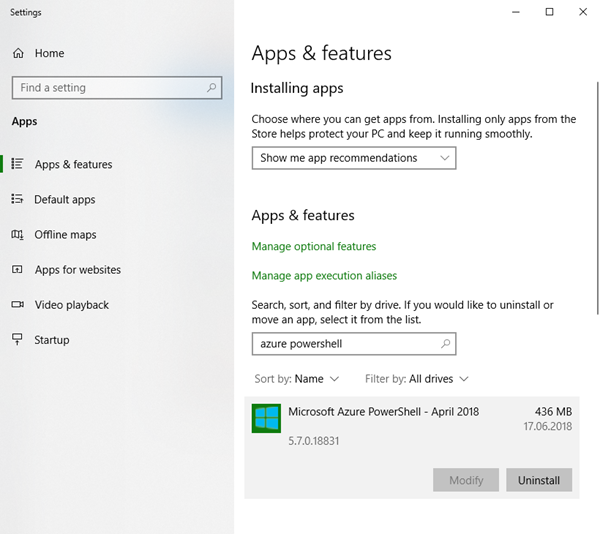
If you installed the Azure PowerShell AzureRM modules on your computer using the MSI package, you must uninstall through the Windows system rather than PowerShell in Start / Settings / Apps (or with CTRL + X, Aps and Features). See more at Uninstall the Azure PowerShell module.
Uninstall the Azure PowerShell and confirm the questions to remove the module from your machine. If installed with PowerShell, run Uninstall-AzureRm as Administrator.
Install the Azure PowerShell Az module
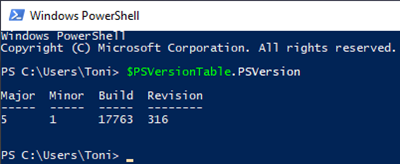
To see what PowerShell version is installed on your computer, type $PSVersionTable.PSVersion
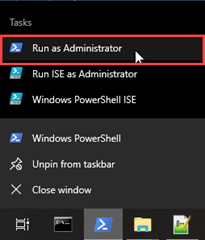
Install the Azure PowerShell module informs about all requirements. For PowerShell 5.x on Windows, the .NET Framework 4.7.2 must be installed. So, the quickest way is to run the Windows PowerShell as Administrator…
…and install the Az module from the the PowerShell Gallery with the that command:
Install-Module -Name Az -AllowClobber
(To install it just for the current user, add the -Scope CurrentUser parameter.) If you already have the Az module installed, you can update with Update-Module -Name Az.
When done, the new module is ready to use on your computer.
Connect to Azure
When installed, we can start connecting to Azure in Windows PowerShell with the command
Connect-AzAccount
Sign-in with your account credentials (and always use MFA).
When working with multiple subscriptions as I do, you need to see the existing subscriptions and then select the desired Azure subscription, as here:
Get-AzSubscription
Set-AzContext -Subscription 'S6'
First, we list all subscriptions, then we select a specific one by name here "S6". Now we can start working with that subscription resources.
Create a subscription inventory
After the authentication was successful and the subscription was selected, we can generate a list of all resources and write to a CSV file like in the following script "get-subscription-inventory.ps1" here.
# Get all resources in the selected subscription

$result = "C:\Temp\subscription-resources.csv"
"SubscriptionName,SubscriptionId,Resource,Name,ResourceGroupName,ResourceId" `

| out-file $OutFilePath -encoding utf8


# Loop through the resources and add to the output file

ForEach ($resource in Get-AzResource)

{
     $AzureSubscription.Name + "," + `
         $AzureSubscription.SubscriptionId + "," + `
         $resource.ResourceType + "," + `
         $resource.Name + "," + `
         $resource.ResourceGroupName + "," + `
         $resource.ResourceId `

| out-file $result -encoding utf8 -append

}
You can see the result and the script and a short description also on my GitHub AzureManagement repository.
Working with the Cloud Shell
BTW, you can use the Az cmdlets in the Azure Cloud Shell as well…
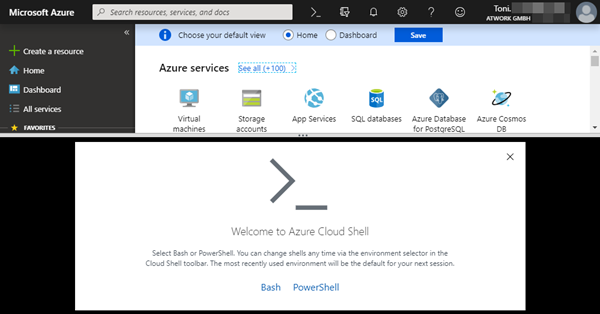
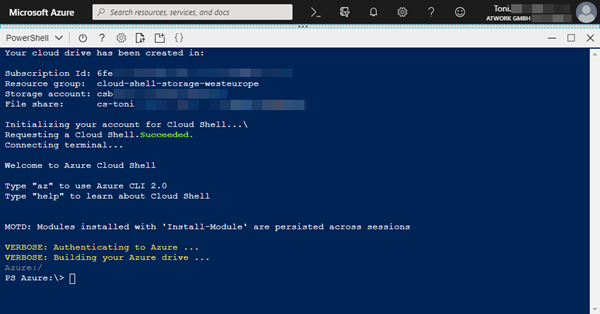
Azure Cloud Shell is a browser-based shell experience to manage and develop Azure resources that runs on Ubuntu 16.04 LTS. When opening in the Azure Portal, your Azure Cloud Shell session is already authenticated for the environment, subscription, and tenant that launched the Cloud Shell session.
After selecting PowerShell, a subscription must be selected for a storage (see https://aka.ms/file-pricing).
This provisioning process takes about a minute. Then, the Cloud Shell can be used.
Now we can directly runs commands, like Get-AzureRmSubscription to list all subscriptions, Set-AzureRmContext –SubscriptionId ... to set the work subscription, etc.
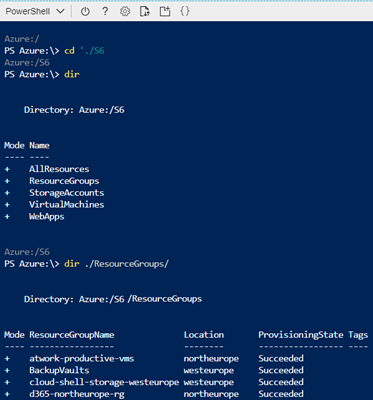
But: Since we have access to the Azure "drives" and we start in drive (Azure:), we can use simple commands as dir and cd, see Navigate Azure resources.
The TAB key works to autocomplete. And since it's an Ubuntu system commands as ls – lisa work… (flashback from my Unix time). Anyway, to enter subscription "S6" and then to list the Resource groups, this works very straight forward…
Etc… Get-Help and Get-AzCommand help as well. See more at Overview of Azure Cloud Shell and a helpful quickstart at Features & tools for Azure Cloud Shell.
I hope this short intro helps for getting familiar with automating tasks in Microsoft Azure. Happy PowerShell-ing!
Categories: Azure, Cloud, Developer, English, Microsoft, PowerShell, Tools
Source: https://blog.atwork.at/post/The-new-Azure-PowerShell-Az-module

